
Easily replace lounger cushions with this DIY guide. Refresh your outdoor space without spending much. Worn or faded cushions can make even the best patio furniture look old.
But replacing them is not hard. With the right steps, you can give your loungers a fresh look quickly. No sewing skills or special tools are needed.
This guide shows you how to measure, pick materials, and install new cushions. You’ll get cushions that fit and feel great.
Whether updating a few chairs or redoing your whole setup, this guide offers a simple, budget-friendly way to add comfort and style back to your lounging area.
Gather Your Materials
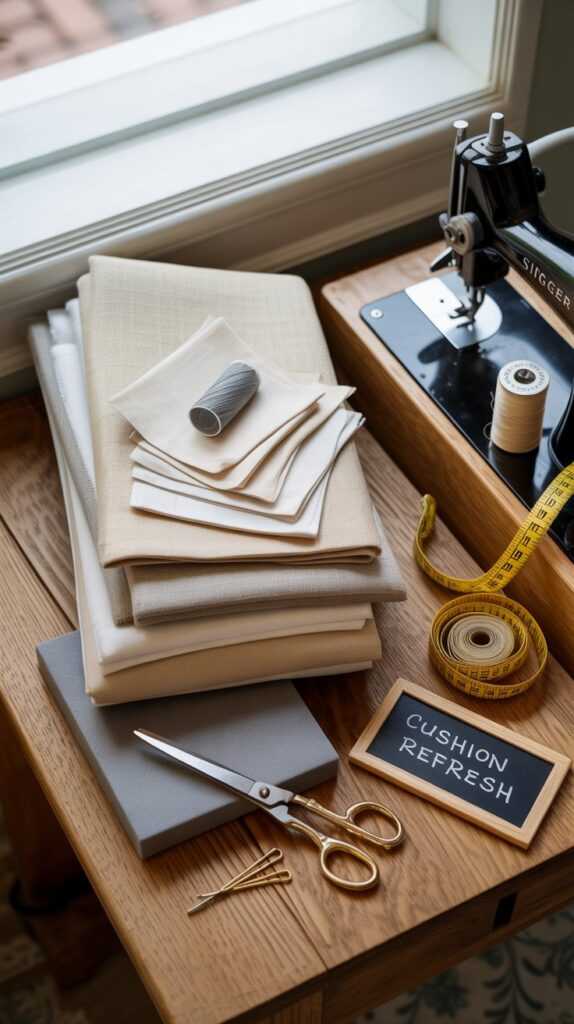
Before starting your DIY lounger cushion replacement, gather your materials. You’ll need fabric, foam, scissors, and a measuring tape. Having everything ready saves time and makes the process smoother.
Choose a durable fabric for outdoor use if your lounger is outside. This helps your new cushion last longer and stay in good condition despite the elements.
Cutting foam to the right size is key for a perfect fit. Measure your lounger carefully, then mark the foam before cutting. Accurate measurements help avoid waste and ensure a snug fit.
Remove Old Cushion
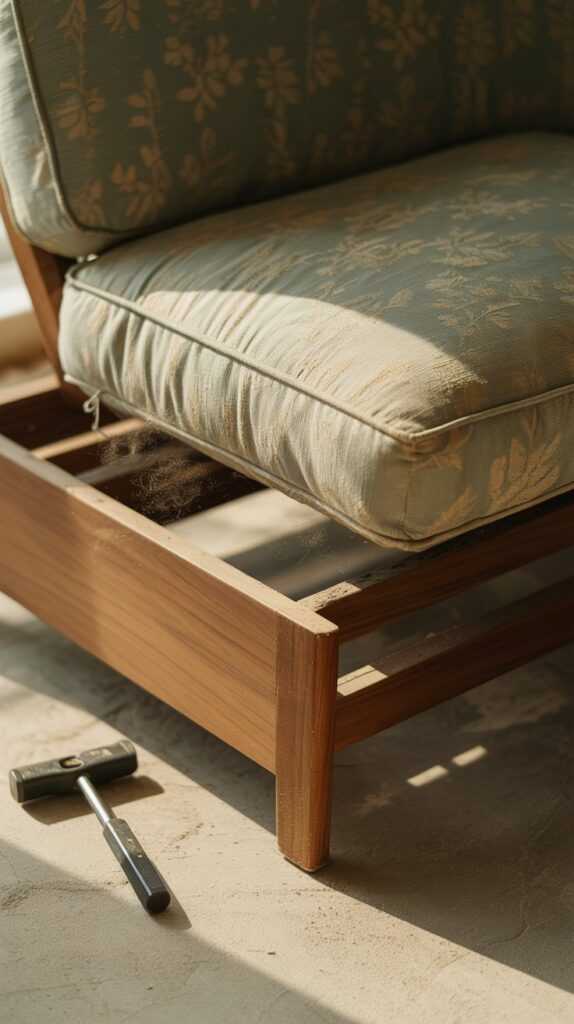
Begin by gently lifting the ties or fasteners holding the old cushion to your lounger. Loosen them carefully to prevent damage. This will help you measure for the new cushion more easily.
After removing the old cushion, lay it flat on a surface. This lets you take precise measurements of its length, width, and thickness. It ensures the new cushion fits perfectly.
Next, check the lounger frame’s condition after removing the old cushion. Look for any repairs needed before adding the new cushion. This ensures a comfortable and safe seating experience.
Measure and Cut Fabric
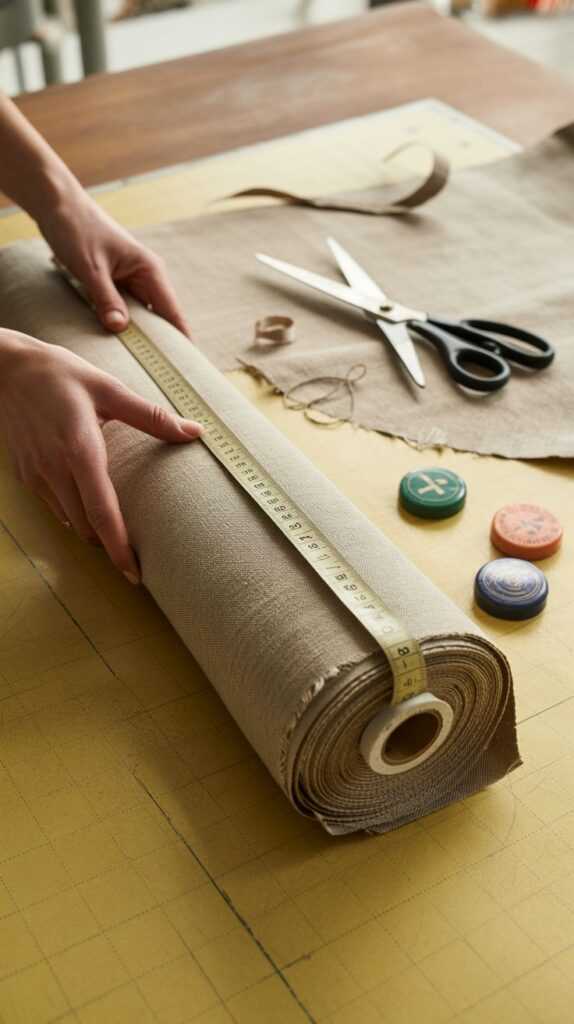
Start by measuring your old cushion’s dimensions. This helps you choose the right fabric size. Remember to add extra around the edges for sewing. This ensures the fabric fits well.
When cutting the fabric, use sharp scissors for clean edges. Lay the fabric on a flat surface and mark the measurements with chalk or a fabric marker. This helps you cut accurately and avoid mistakes.
Choose a durable fabric that can handle wear and tear. Outdoor cushions face sun and moisture, so select fabric that resists fading and water damage. This choice will make your new cushion last longer.
Sew the Fabric

First, place the fabric pieces with the right sides together. Pin them to keep them secure. Use a sewing machine or needle and thread to sew the edges. Leave one side open for the foam insert.
Choose strong thread that matches your fabric for durability. Double-stitch the corners for added strength since they experience more stress. This will help your cover last longer with regular use.
After sewing the sides, trim any excess fabric from the seams to cut down on bulk. Turn the cover right side out and press the seams flat with an iron. This gives your cushion cover a neat, professional finish.
Insert Foam and Finish
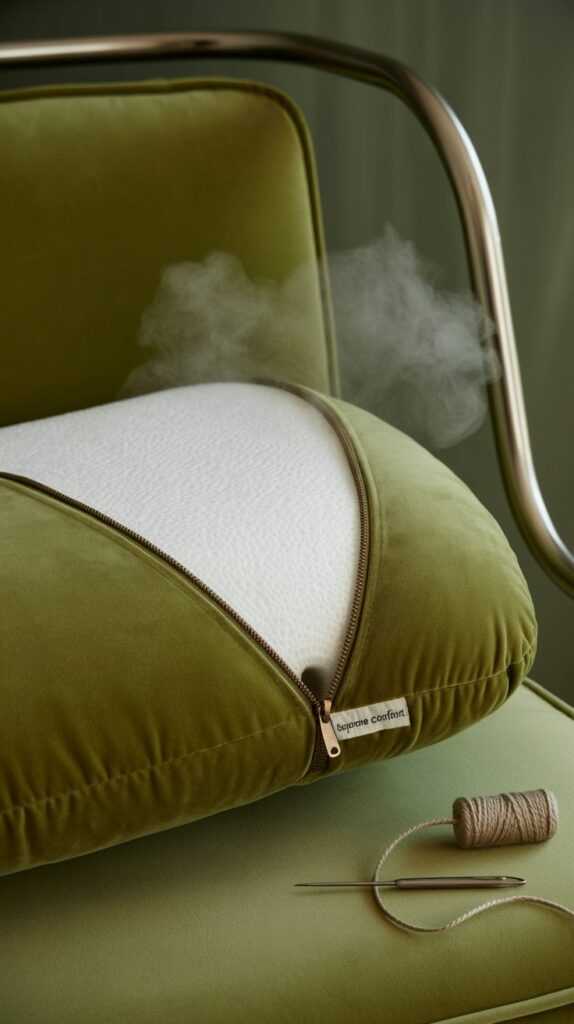
Carefully place the foam inside the new cover. Make sure it fits snugly in all corners. This step gives your cushion a smooth, professional finish.
After that, sew the open side shut. You can use a sewing machine or hand stitch. This keeps the foam secure and prevents shifting or bunching. Both can affect comfort and appearance.
Once you finish sewing, your new cushion is ready to use. Enjoy the fresh look and added comfort of your DIY lounger cushion replacement. It will enhance the overall feel of your furniture.
Conclusion
Follow these steps to replace your lounger cushion. You’ll enjoy a more comfortable and stylish seat. Take your time and gather all materials first. This will make the process easier. Happy DIY-ing!
How Do I Know When It’s Time to Replace Lounger Cushions?
If your lounger cushions are flat, torn, or faded, it’s time to replace them. Sagging foam and uncomfortable seating also show they’ve lost support.
Visual signs like stains, mildew, or fading can make your outdoor area look worn. A new set of cushions brings back comfort and style to your space.
Can I Replace Lounger Cushions Without Sewing?
Yes, you can replace lounger cushions without sewing. You can use pre-made cushion covers or no-sew methods like fabric glue or Velcro.
Still, simple hand stitching or a sewing machine gives a better result. Even basic sewing skills can make your DIY cushion project look nicer and last longer.
What Type of Fabric Is Best for Outdoor Lounger Cushions?
Outdoor cushions need fabric that resists moisture, sunlight, and mildew. Solution-dyed acrylic and polyester blends are great choices for durability.
These fabrics hold color well and withstand regular rain and UV exposure. Choosing quality outdoor fabric keeps your cushions fresh and vibrant all year round.
How Do I Ensure My Foam Inserts Fit Correctly?
Always measure your old cushion or lounger base carefully. Get the length, width, and thickness just right. You might want to add a bit of extra height for comfort.
Use a straight edge and a sharp blade to mark and cut the foam. This ensures clean lines. A snug fit prevents bunching and gives your cushion a tailored, professional look.
How Long Does It Take to Replace Lounger Cushions at Home?
A basic DIY cushion replacement takes 1–2 hours. Your experience and tools affect this time. Cutting foam, sewing fabric, and inserting the foam are simple steps.
If you prepare all materials first and work on a flat, organized surface, the process goes faster. You can transform your entire outdoor space in just one afternoon.