
Halloween has a way of sneaking up on you. One minute, you’re enjoying pumpkin spice lattes, and the next, your neighbors have skeletons in their yards.
If you’re like me, you might not want to buy another pricey decoration that looks like your aunt’s from 2003. That’s why pumpkin centerpiece DIY ideas for Halloween are perfect.
They’re affordable, customizable, and way more impressive than store-bought options.
So, grab a cup of coffee (or cider if you prefer), and let’s explore how to turn a few pumpkins into a stunning Halloween table centerpiece.
Why DIY Pumpkin Centerpieces Are Worth It
You might be wondering, why go through all the trouble when you can just pick up a plastic pumpkin at the store? Well, here’s the thing.
- Budget-friendly: Real pumpkins cost a fraction of what you’d pay for fancy Halloween décor.
- Unique: Nobody else’s centerpiece will look exactly like yours.
- Creative therapy: Honestly, crafting can be surprisingly relaxing after a long day.
- Eco-friendly: Real pumpkins can be composted when you’re done.
And let’s not forget, people love asking, “Where did you get that?” You get to smile and say, “Oh, this old thing? I made it.”
Choosing the Right Pumpkin
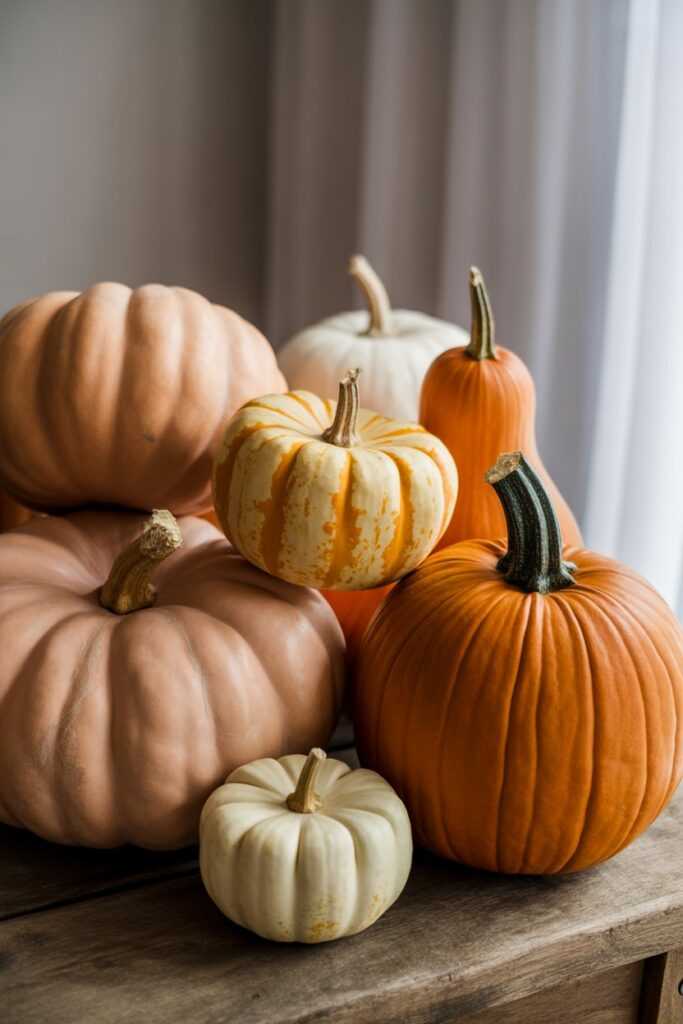
Not all pumpkins are created equal. If you’ve ever tried to carve one of those rock-hard jumbo pumpkins, you know what I mean.
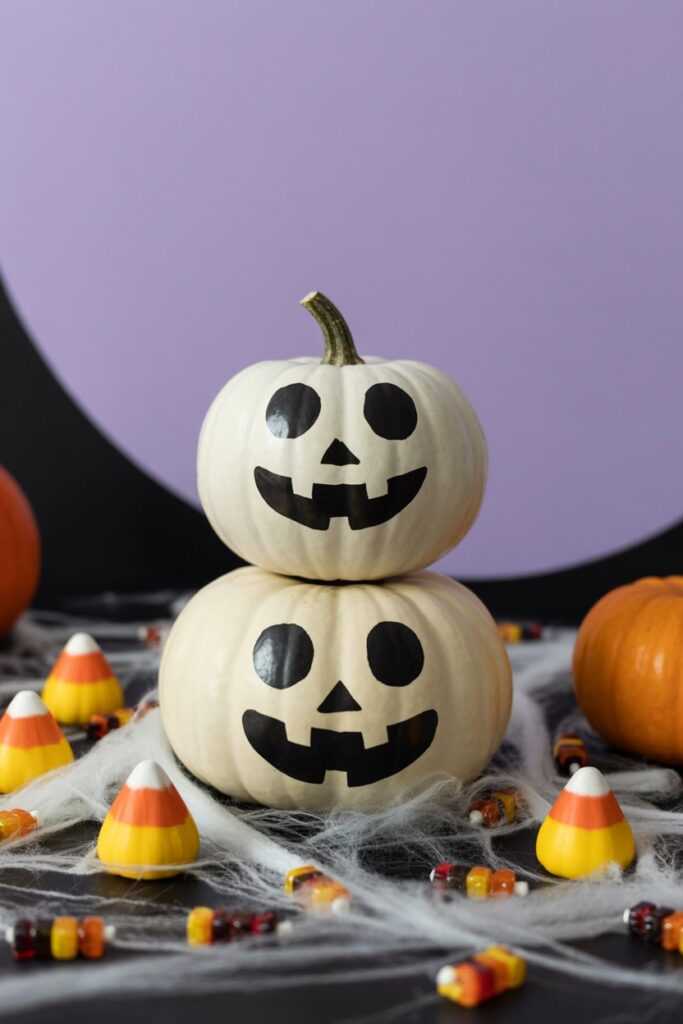
- Mini pumpkins work perfectly for smaller centerpieces or scattered arrangements.
- Medium pumpkins give you enough surface to carve or paint without overwhelming the table.
- White pumpkins (sometimes called ghost pumpkins) look chic and modern if you’re going for a more stylish vibe.
- Cinderella pumpkins are those flatter, wider pumpkins that make excellent bases for stacking.
Pro tip: Look for pumpkins with flat bottoms so they don’t roll around when you’re arranging them. Nobody wants a runaway pumpkin knocking over their candles.
Check out these festive pumpkin centerpiece picks on Amazon today
Tools and Supplies You’ll Need
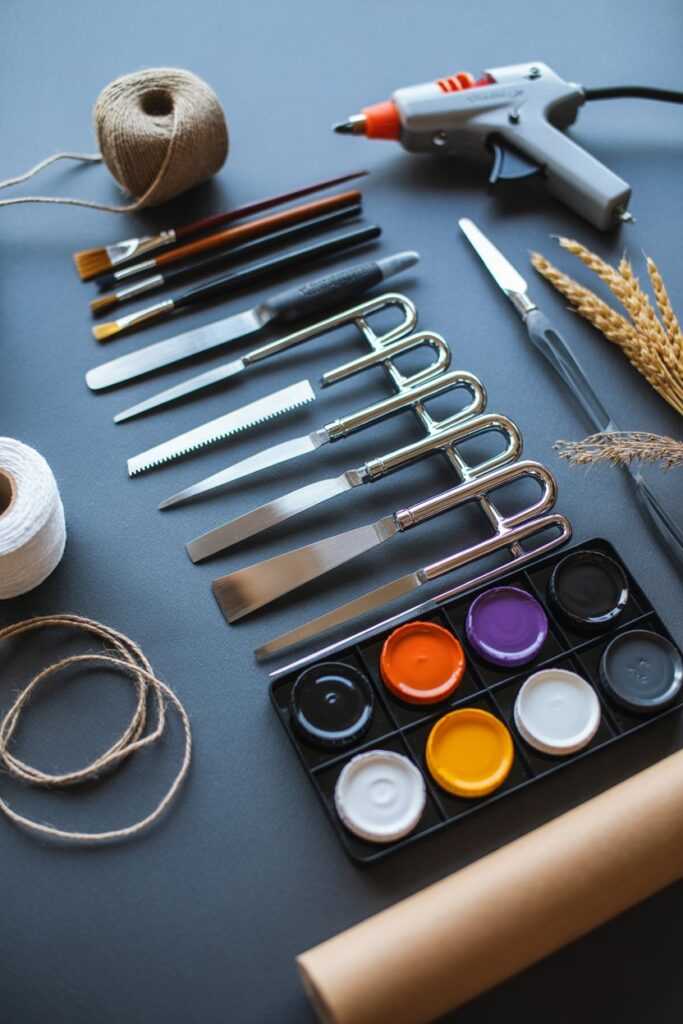
Let’s not overcomplicate this. You don’t need a craft store’s worth of tools to pull this off. Most of this stuff is either already at home or super cheap.
- Pumpkins (obviously)
- Carving knife or pumpkin carving kit
- Paints or spray paint
- Paintbrushes and sponges
- Floral foam or mason jars (if you’re adding flowers)
- Candles or LED lights
- Hot glue gun
- Decorative extras like fake spiders, autumn leaves, ribbon, or lace
If you have kids, you might want to skip the hot glue gun. Unless you enjoy explaining to your doctor how you turned a family craft night into a trip to the ER.
Pumpkin Painting Ideas for Centerpieces
Carving pumpkins can be messy. If you’d rather avoid pumpkin guts sticking to your shirt, painting is a solid option.
Classic Black and Orange
Nothing screams Halloween more than the classic black-and-orange combo. Paint your pumpkin a deep black, then stencil on orange bats, cats, or witches.
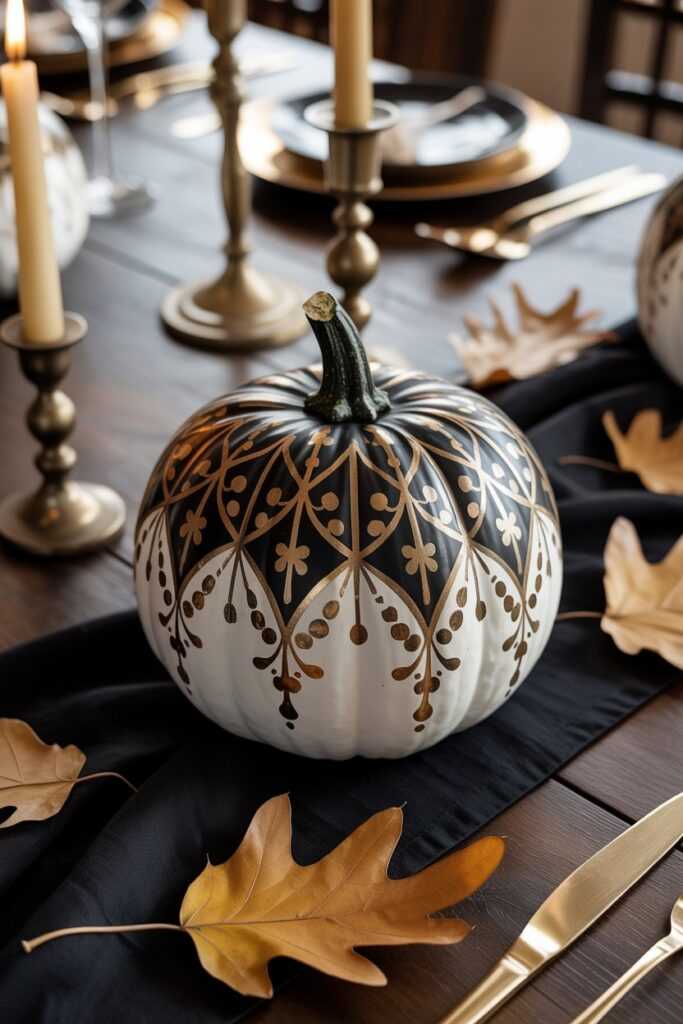
Metallic Glam
Spray-paint pumpkins gold, copper, or silver for a more upscale look. These shine beautifully under candlelight and make your table look Pinterest-worthy.
Chalkboard Pumpkins
Coat a pumpkin with chalkboard paint and write spooky messages or doodles with chalk. Kids love changing the designs, and it’s basically Halloween décor you can update every day.
Painting gives you room to play, and the best part is you don’t need to be an artist. Honestly, half the time, messy brush strokes add to the spooky charm.
Shop the best Halloween centerpiece essentials now on Amazon
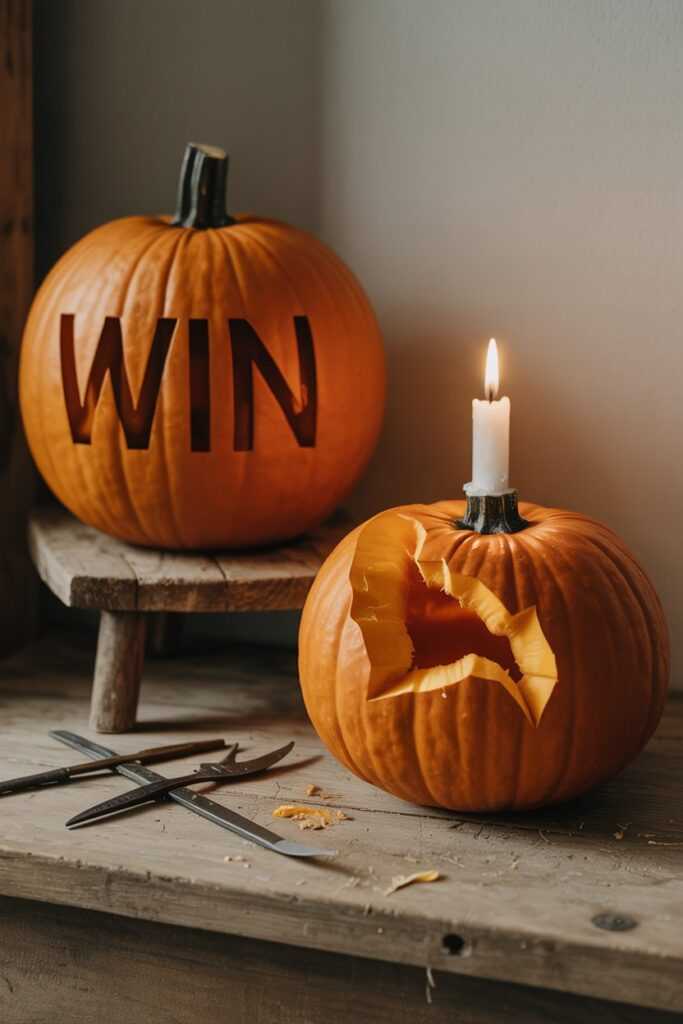
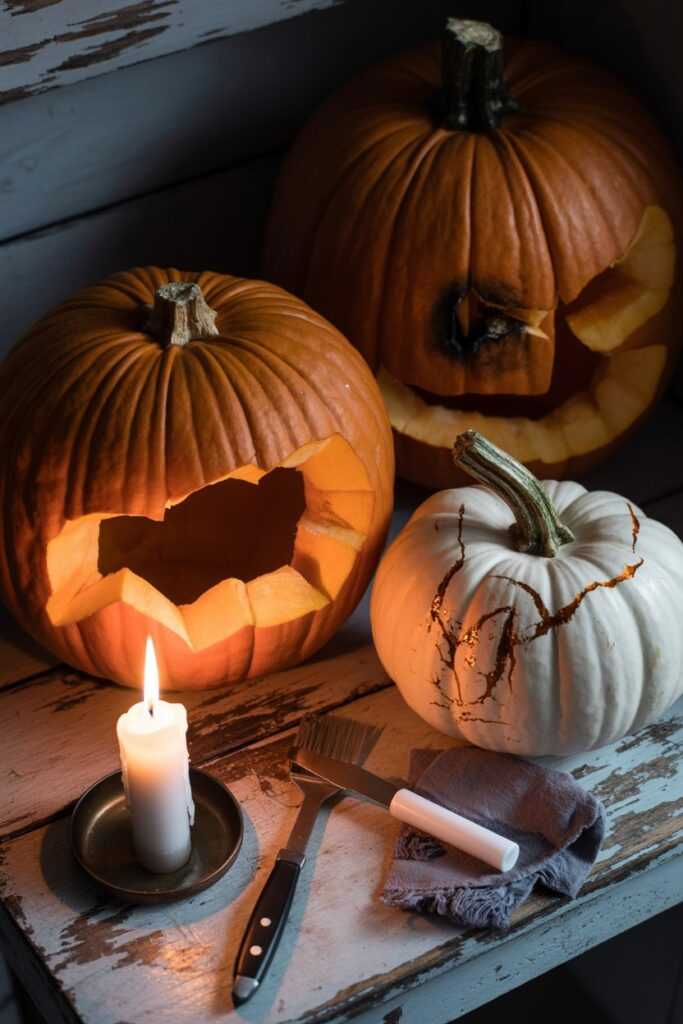
Carved Pumpkin Centerpieces
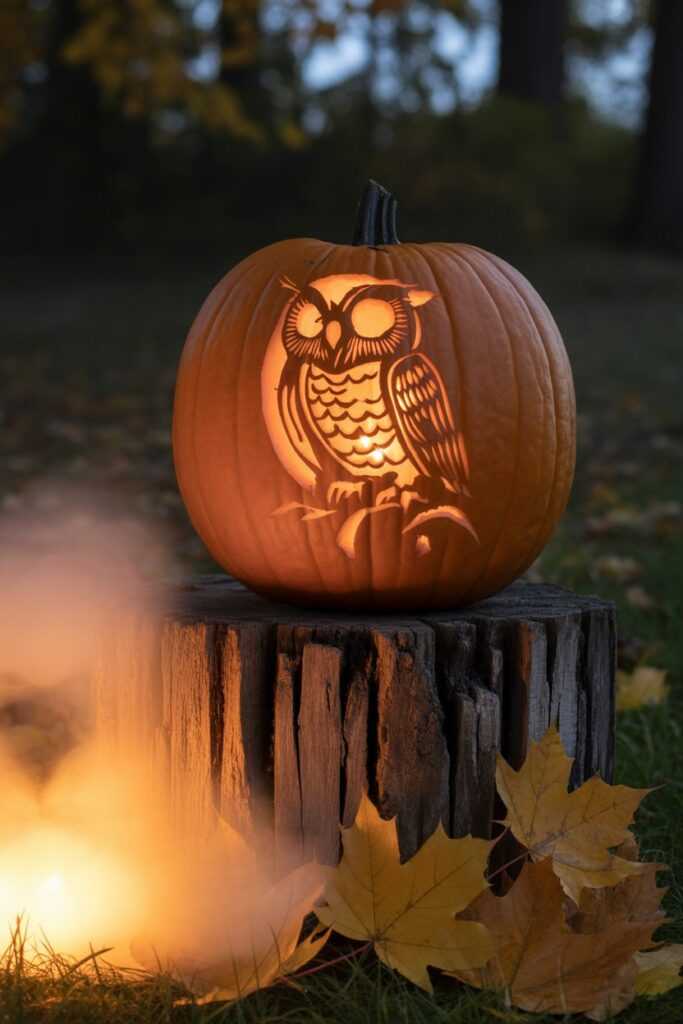
Yes, carving is a bit of work, but it creates a classic Halloween vibe.
Hollowed-Out Pumpkin Vase
Carve out the inside of a medium pumpkin, line it with a jar or floral foam, and arrange fresh flowers inside. Think sunflowers, marigolds, or even black-dyed roses if you want to go full spooky.
Candle Holders
Small pumpkins can be hollowed out just enough to hold tea lights or LED candles. Line them up in the center of the table for a warm, eerie glow.
Stenciled Designs
If freehand carving isn’t your strong suit, stencils save the day. Tape one on and trace before cutting. You’ll look like a pro even if your knife skills scream “rookie.”
One note: always use LED candles if you’re worried about safety. Real flames plus dried pumpkin flesh plus tablecloth equals one heck of a story, but probably not the one you want to tell.
No-Carve Pumpkin Hacks

Not in the mood for paint or knives? No problem. These no-carve options are quick and safe.
- Wrap with lace or netting for a gothic look.
- Add googly eyes for a fun, kid-friendly design.
- Stick on decals like spiders, stars, or skulls.
- Wrap with twine for rustic farmhouse vibes.
These work great if you’re decorating last-minute or if your idea of DIY usually ends in disaster.
Discover top-rated pumpkin décor ideas waiting for you on Amazon
Mixing Pumpkins with Other Halloween Décor
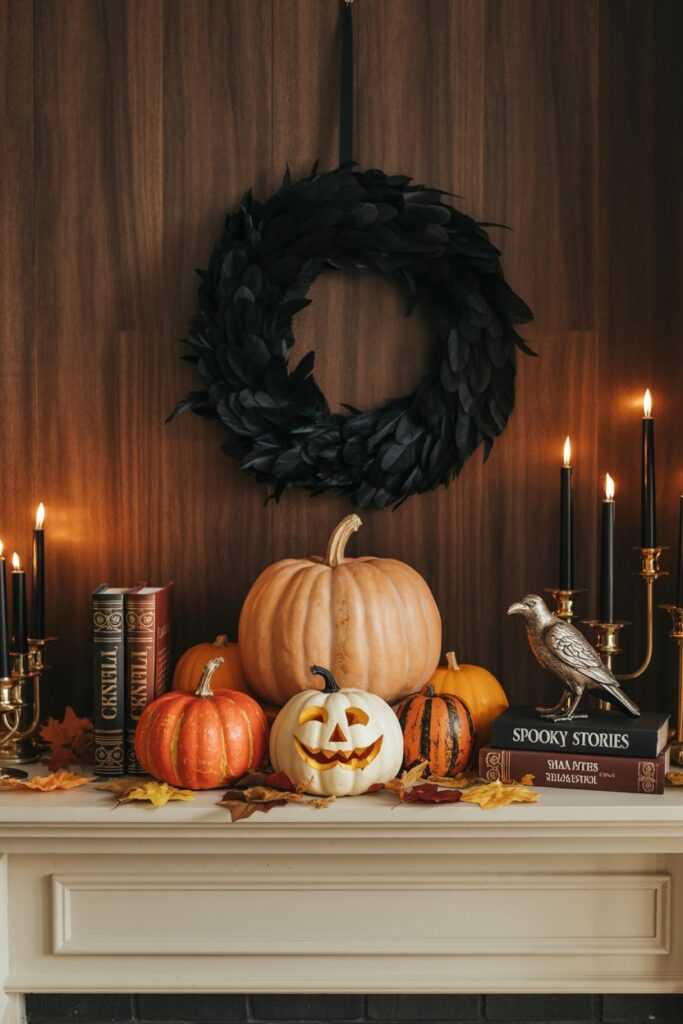
A pumpkin centerpiece doesn’t have to stand alone. Mix and match to create a fuller display.
- Scatter autumn leaves and pinecones around your pumpkins.
- Add black taper candles for dramatic height.
- Use a spooky table runner under your arrangement.
- Toss in mini skulls or faux bones for extra creep factor.
Think of your pumpkins as the star of the show and the other decorations as the supporting cast. Together, they create a scene worth talking about.
Fun Themed Pumpkin Centerpiece Ideas
Ready to step it up a notch? Here are some themed centerpiece ideas that will impress your guests.
Haunted Forest
Use moss, twigs, and dark-colored pumpkins to create a creepy forest vibe. Add tiny LED fairy lights for an eerie glow.
Witch’s Cauldron
Stack pumpkins in a bowl or cauldron and drape fake cobwebs over the top. Tuck in some faux potion bottles, and you’ve got instant witchy charm.
Pumpkin Stack Tower
Stack three or four pumpkins in different sizes, glue them together, and decorate with ribbon or garland. It’s basically a pumpkin snowman but way spookier.
Minimalist Chic
If spooky isn’t your style, line up small white pumpkins with eucalyptus sprigs. It’s simple, modern, and works even after Halloween.
My DIY Pumpkin Wins (and Fails)
Last year, I carved a medium pumpkin, stuffed it with red roses, and added a few black feathers sticking out. My sister walked in and said, “Wow, did you order that from a florist?”
Nope, I just got carried away with a glue gun and some Dollar Store finds. Point is, these DIY projects don’t need to be perfect. In fact, the imperfections often make them more memorable.
And let’s be honest, half the fun of making a pumpkin centerpiece is laughing at your mistakes.
I once painted a pumpkin with glow-in-the-dark paint, and instead of looking spooky, it glowed like a radioactive tennis ball. Lesson learned: test your paint first.
Quick Tips for Long-Lasting Pumpkins
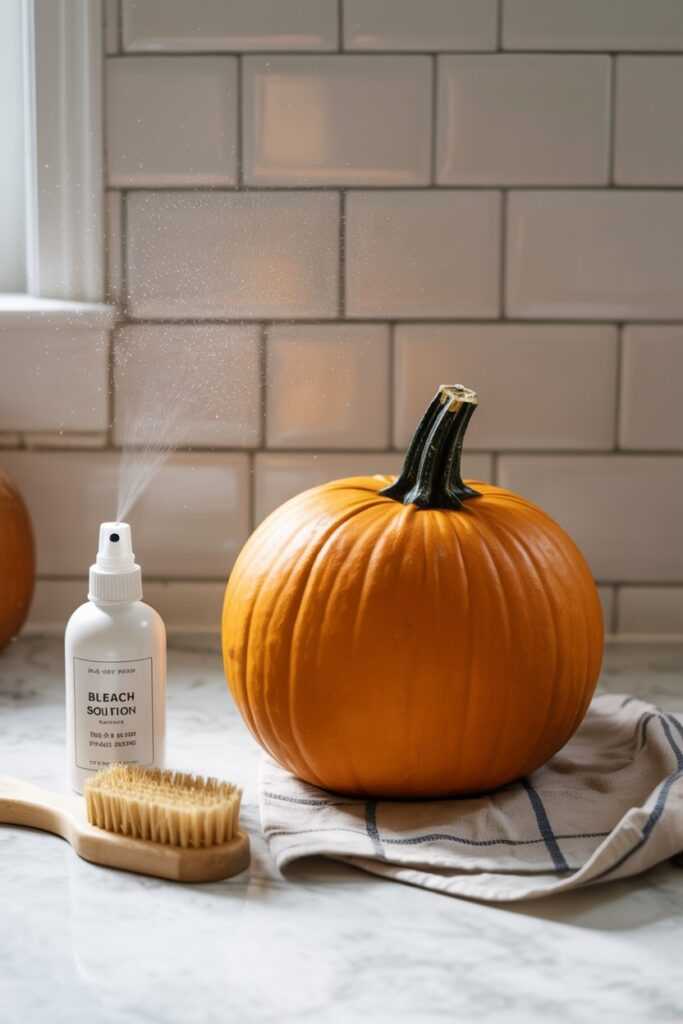
Pumpkins don’t last forever, but you can keep them fresh longer with a few tricks.
- Clean thoroughly: Wipe down the outside with a mild bleach solution to kill bacteria.
- Refrigerate overnight: If your carved pumpkin starts to wilt, stick it in the fridge.
- Petroleum jelly: Rub it on carved edges to keep them from drying out.
- Avoid heat: Keep your pumpkins away from radiators, ovens, or direct sunlight.
It’s heartbreaking when your masterpiece turns into a soggy mess after two days, so a little maintenance goes a long way.
Common Mistakes to Avoid
Because let’s face it, DIY can sometimes turn into “destroy it yourself.”
- Overcrowding your table: Less is more. Don’t block people’s view across the table with a pumpkin mountain.
- Ignoring proportions: A giant pumpkin on a tiny table looks more like a squash invasion than a centerpiece.
- Using real candles in tight spaces: Fire hazard, anyone? Stick with LED for safety.
- Not sealing painted pumpkins: Paint chips faster than you’d think. A quick spray sealant fixes that.
Avoid these rookie mistakes, and your centerpiece will actually look intentional, not like a Pinterest fail.
Conclusion: Time to Get Crafty
So there you have it. From painting and carving to no-carve hacks and themed displays, pumpkin centerpiece DIY for Halloween is your chance to get creative, save money, and impress your guests.
It doesn’t matter if your project looks straight out of a magazine or like it was made during a chaotic craft night. What matters is the fun you had making it.
Next time you host a Halloween party, don’t just throw some candy in a bowl and call it a day.
Grab a few pumpkins, pull out your paints, knives, or glue, and create something that’s uniquely yours. Who knows, you might just start a new Halloween tradition.
How do you make a simple pumpkin centerpiece for Halloween?
The easiest way to make a pumpkin centerpiece is to use a medium-sized pumpkin. Hollow it out and use it as a vase for flowers or candles.
You don’t need fancy tools—just a carving knife and some floral foam or a mason jar to hold your arrangement.
Add seasonal flowers like sunflowers or marigolds, and you’ll have a centerpiece in under 30 minutes.
If you want to avoid the mess of carving, simply paint your pumpkin or wrap it in lace, ribbon, or twine.
A simple DIY pumpkin centerpiece takes little effort but still makes a big visual impact on your Halloween table.
How long will a carved pumpkin centerpiece last?
Carved pumpkins last about 3 to 7 days before they soften or mold. How long they last depends on your home’s temperature, humidity, and care.
To make them last longer, clean the pumpkin well, refrigerate it overnight if it wilts, and apply petroleum jelly to the carved edges to keep moisture in.
For a longer-lasting option, try a no-carve centerpiece. Painted or decorated pumpkins can stay fresh for two weeks or more, especially if kept in a cool place.
This is a great choice if you want your centerpiece to last all through Halloween.
What materials do I need for a DIY pumpkin centerpiece?
You don’t need a lot of supplies. At a minimum, get pumpkins, a carving knife, and either paint or decorations like lace, ribbons, or decals.
If you want to add flowers or candles, have floral foam, mason jars, or LED lights handy. A hot glue gun can help secure decorations, but it’s not required for a quick project.
The best part is you can use what you already have at home.
Small touches like autumn leaves, pinecones, or leftover Halloween decorations can make your pumpkin centerpiece look polished and unique.
What are some no-carve pumpkin centerpiece ideas?
No-carve ideas are great for a quick, safe, and mess-free option.
You can wrap pumpkins in lace for a gothic look, paint them metallic gold for glam, or use decals for easy customization.
Mini pumpkins can even sport googly eyes for a fun, kid-friendly display.
These options last longer than carved pumpkins and keep your décor fresh all season.
You can mix and match styles—like rustic twine, modern metallics, or playful designs—to create a centerpiece that fits your Halloween theme.
Can I mix pumpkins with other Halloween decorations for a centerpiece?
Absolutely. Pumpkins are versatile. They can be the focal point or part of a larger display. You can scatter autumn leaves and pinecones around them for a harvest theme.
Or, add black candles and faux cobwebs for a spooky touch. A table runner underneath anchors the design and adds intention.
Balance is key. Don’t overcrowd your table with too many props. Think of pumpkins as the star.
Let other decorations be the supporting cast. Together, they create a centerpiece that feels complete and ready for Halloween guests.