
Christmas décor can feel the same year after year. You pull out the same old ornaments, the same wreath, and that sad string of lights you promised to replace last January.
Sound familiar? That’s why a DIY farmhouse advent calendar wall display is a fun change. It’s personal, cozy, and brings back the excitement of counting down to Christmas.
I built my first farmhouse advent calendar a few years ago. It quickly became the highlight of my holiday setup.
Friends kept asking where I “bought” it, but the truth is, it came together with a few supplies, some creativity, and more hot glue burns than I’d like to admit.
If you want to try something new this season, I’ll guide you through everything you need to know.
Why Choose a Farmhouse-Style Advent Calendar?
There’s just something about farmhouse décor that feels warm, nostalgic, and inviting.
The farmhouse style mixes rustic charm with practicality, which makes it perfect for holiday projects.
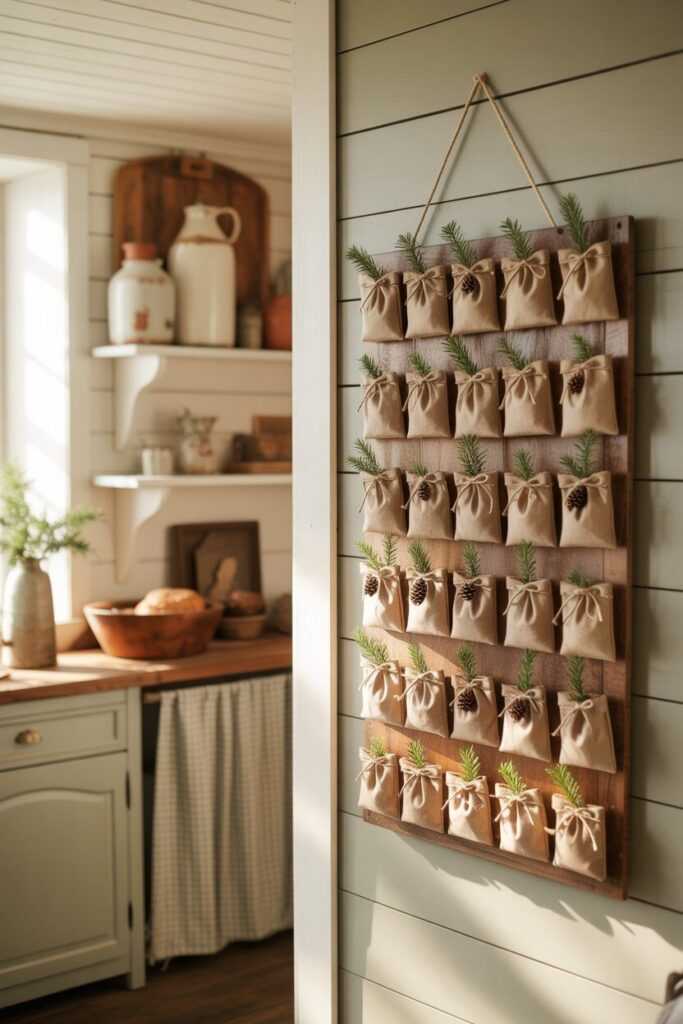
A wall display advent calendar fits right in because it combines décor and tradition in one creative package.
Think about it: you’re not just counting down days. You’re creating a focal point in your home that blends with shiplap walls, neutral tones, and all those cozy plaid throws.
Plus, unlike store-bought plastic calendars that fall apart after one season, a DIY version feels more intentional and personal.
And honestly—doesn’t homemade always beat mass-produced?
Shop the featured farmhouse finds directly on Amazon today
Planning Your DIY Farmhouse Advent Calendar
Before you grab your hammer and nails, it’s smart to plan out your design.
A little prep saves you from realizing halfway through that your “rustic chic” idea actually looks like random wood scraps stuck on a wall.
Key Things to Decide Upfront
- Size of the display: Do you want a small piece for a corner wall or a statement piece above the fireplace?
- Layout: Will you arrange numbers in rows, a tree shape, or something completely different?
- Materials: Do you prefer a wooden backdrop, chicken wire, or even a framed canvas?
- Countdown method: Will you use bags, envelopes, little boxes, or mini buckets for each day?
Personally, I like using small kraft paper bags clipped onto twine.
They look rustic, they’re easy to swap out, and they give me plenty of room to sneak in little chocolates or handwritten notes.
Materials You’ll Need
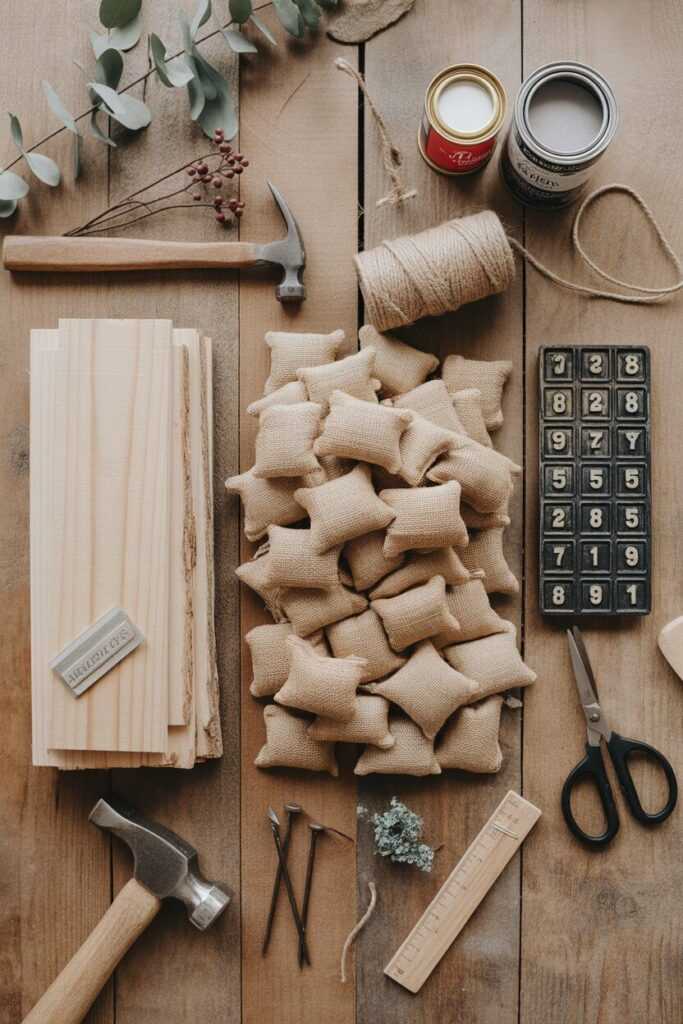
Here’s the fun part—gathering supplies. You don’t need fancy tools, but the farmhouse style thrives on a mix of natural, neutral, and slightly weathered elements.
- Wooden board, pallet, or large frame
- Burlap or linen fabric for backing
- Twine, jute rope, or rustic ribbon
- Mini clothespins or clips
- Small bags, boxes, or envelopes (numbered 1–24)
- Stencils or number stickers
- Optional décor: pinecones, faux greenery, fairy lights, cinnamon sticks
Pro tip: Don’t overthink perfection. Farmhouse décor loves imperfections. A few uneven cuts or chipped paint can actually add to the rustic charm.
Check these charming Advent calendar pieces available on Amazon
Step-by-Step: Building the Farmhouse Wall Display

Now comes the creative (and slightly messy) part.
Step 1: Choose Your Base
Start with your base—this could be a wooden board, a pallet, or even an oversized picture frame. Sand it down a little, but don’t stress over making it smooth. Rustic means character.
Step 2: Add Fabric or Paint
Cover the base with burlap or linen for a soft texture, or give it a distressed paint job with white, gray, or muted green chalk paint.
If you’re impatient like me, slap on the paint, sand a few spots, and call it “vintage.”
Step 3: Attach Twine Rows
Stretch twine or rope horizontally across your base, securing it with nails or a staple gun. Space the rows evenly—you’ll need enough room to clip on 24 items.
Step 4: Number Your Bags or Boxes
Use stencils, stickers, or hand lettering to mark each bag or envelope from 1 to 24. This is your countdown. If your handwriting looks like a toddler’s, stencils are your best friend.
Step 5: Clip Them On
Attach the bags or boxes to the twine using mini clothespins. Make sure they hang securely but still look casual and relaxed.
Step 6: Decorate the Frame
Add faux greenery, pinecones, or fairy lights around the edges. Don’t go overboard though—the focus should stay on the countdown bags.
And there you have it—a farmhouse advent calendar that doubles as a wall display.
What to Put Inside the Calendar

Sure, candy is the go-to filler, but if you want to mix things up, try these ideas:
- Mini ornaments: Let the kids add one to a separate “countdown tree” each day.
- Holiday activities: Write down fun tasks like “make hot cocoa” or “watch Home Alone.”
- Small gifts: Stickers, keychains, or nail polish for a fun surprise.
- Faith-based notes: Include daily Bible verses or inspirational quotes.
- Acts of kindness prompts: Encourage giving by suggesting things like “bake cookies for a neighbor.”
This is where you can really personalize the calendar. Honestly, the surprises inside are half the fun.
Discover the farmhouse accents you can grab now on Amazon
Styling Your Wall Display

Here’s the trick: you don’t want it to look like a preschool craft project. Styling makes all the difference.
Keep It Neutral
Stick with natural tones like beige, cream, white, and muted greens. These colors scream farmhouse chic without trying too hard.
Add Natural Elements
Incorporate pine sprigs, eucalyptus, or dried orange slices. They not only look gorgeous but also add a subtle seasonal scent.
Play with Lighting
String warm white fairy lights around the frame. The soft glow makes the whole thing pop, especially at night.
Balance Symmetry and Chaos
Farmhouse décor often embraces “organized mess.” Keep your rows straight, but let the bags dangle slightly at different heights. It gives off that effortless charm.
Personal Touches That Make It Special
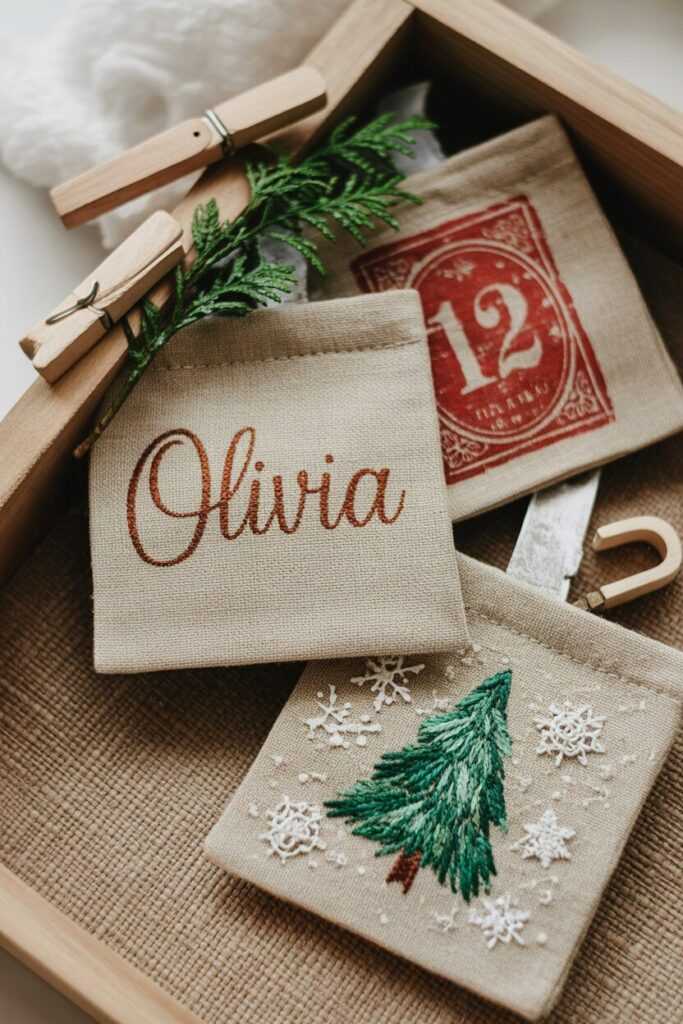
The best part about DIY projects is that no two look the same. You can tailor yours to fit your family, your home, and your holiday traditions.
For example, I included little handwritten notes with cheesy Christmas jokes inside mine. My kids groaned every single time, but I know they secretly loved it.
Another year, I swapped candy for daily activities, which turned December into a month of mini adventures.
Your farmhouse advent calendar should reflect your style. Whether you love minimal décor or you go full-on “Christmas threw up in my living room,” the flexibility is all yours.
Common Mistakes to Avoid
Even DIY pros mess up sometimes. Here are a few things to watch out for:
- Overloading the bags: If you try to stuff in too much, the clips won’t hold.
- Using weak tape or glue: Trust me, nothing kills the mood like bags falling off mid-December.
- Ignoring weight distribution: Spread heavier items evenly or the whole thing will tilt.
- Forgetting the wall damage factor: If you rent, don’t nail directly into the wall. Use removable hooks or lean the display against a surface.
Why It Beats Store-Bought Calendars
Let’s be real: store-bought advent calendars are convenient, but they’re also boring and forgettable.
The chocolate tastes like cardboard half the time, and the designs look like they came straight from a factory conveyor belt.
With a DIY farmhouse advent calendar wall display, you get:
- A unique piece of décor that no one else has.
- A chance to personalize every single detail.
- Higher quality (because you actually care about what’s inside).
- A creative project that becomes part of your holiday traditions.
Plus, you’ll get bragging rights. Nothing feels better than saying, “Oh, this? Yeah, I made it.”
Wrapping It Up
So there you have it—a DIY farmhouse advent calendar wall display idea that’s fun to make, beautiful to look at, and endlessly customizable.
It turns a simple countdown into a family tradition and adds serious farmhouse charm to your holiday décor.
If you’ve been thinking about trying a new Christmas project this year, this one checks all the boxes.
It’s affordable, it’s personal, and it’s guaranteed to spark joy every single day in December.
And hey—when your friends ask where you bought it, you can smile, sip your cocoa, and say, “Oh, this old thing? Just a little farmhouse magic I whipped up.”
How do I make a farmhouse advent calendar look rustic but not messy?
The key is balance. Farmhouse décor loves imperfections, but avoid a look like a school craft project. Use neutral tones such as beige, cream, and muted greens.
Incorporate natural materials like burlap, twine, and wood. These elements create a rustic vibe without cluttering the design.
Another tip is to maintain an organized layout. Even if bags or boxes hang at different heights, keep the overall rows straight.
Think of it as “structured casual”—like styling your hair to seem effortless, even if it took 20 minutes. That’s the sweet spot for farmhouse charm.
What should I put inside a DIY advent calendar?
Candy is always popular, but consider adding holiday activity cards. Write fun ideas like “bake gingerbread cookies” or “watch a Christmas movie.”
This turns your countdown into an experience, not just treats. Kids love the surprise of opening each day to find a mini adventure.
You can also include small trinkets or faith-based notes. Ornaments, stickers, keychains, or Bible verses fit well.
For families focusing on giving, add kindness prompts like “make a card for Grandma.” The options are endless, and that’s the joy of DIY—you make it personal.
Can I make a farmhouse advent calendar without power tools?
Sure! You don’t need to be a woodworking expert to make this. Many charming farmhouse advent calendars use simple frames, fabric backdrops, and twine.
A hot glue gun, scissors, and a stapler will take you far in this project.
For a sturdier display, buy a pre-made wooden frame or pallet board from a craft store. Then, style it farmhouse-style.
The key is creativity, not power tools. So if drills scare you (I get it), don’t worry. You can still create a beautiful rustic display with easy materials.
How do I hang a farmhouse advent calendar without damaging my walls?
If you own your place and don’t mind nails, mount it directly for a secure hold. If you’re renting, use removable hooks or command strips.
They can hold your advent calendar’s weight without damaging your walls.
Another option is to lean the display against a wall or place it on a console table. This gives you a farmhouse look without worrying about holes in the drywall.
Leaning it also adds a casual vibe that suits rustic décor. Plus, you can easily move it to change your holiday setup.
Why should I DIY an advent calendar instead of buying one?
Store-bought advent calendars are convenient, but they often lack personality. Most have generic chocolates or cheap toys that don’t create a memorable tradition.
A DIY farmhouse advent calendar, however, becomes a custom piece of décor and a family keepsake.
Making your own gives you full control. You choose the style, fillers, and size.
It can reflect your family’s traditions, like faith notes, daily kindness challenges, or just a steady supply of chocolate.
Plus, there’s pride in saying, “Yep, I made that.” It makes your Christmas décor feel more special.