
You can walk into any grocery store, grab a box mix, and be done. But you’re here, which means you know homemade brownies taste better.
And when you use cocoa powder instead of melted chocolate? That’s where it gets exciting.
This article covers everything you need to make fudgy, rich, chocolatey brownies with cocoa powder.
You’ll learn why cocoa powder works better than you think and discover simple tricks that turn a good brownie into one that leaves people speechless after the first bite.
Why Cocoa Powder Deserves More Credit
A lot of bakers overlook cocoa powder in brownie recipes because they assume melted chocolate is automatically the superior option. That assumption is understandable, but it is also wrong.
Cocoa powder is pure, concentrated chocolate flavor.
When you remove the cocoa butter from cacao, what you are left with is an intense, almost smoky chocolate punch that melted chocolate simply cannot replicate on its own.
It is like comparing fresh espresso to a latte. Both are good, but they do different things.
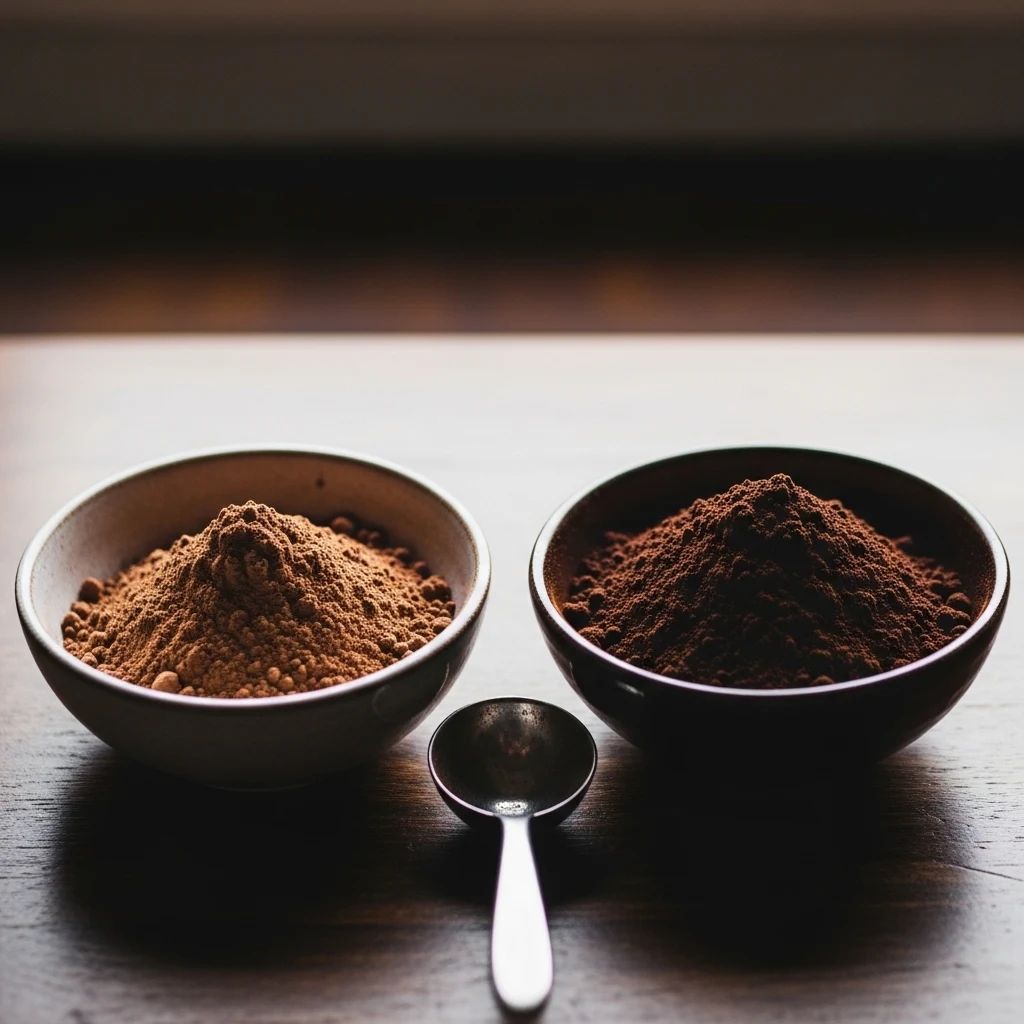
There are two types of cocoa powder you will encounter, and the difference matters more than most people realize.
Natural Cocoa Powder vs. Dutch-Process Cocoa Powder
Natural cocoa powder is acidic and lighter in color. It has a sharp, fruity chocolate flavor and reacts with baking soda to help baked goods rise. Brands like Hershey’s Classic are natural cocoa.
Dutch-process cocoa powder has been treated with an alkali to neutralize its acidity. This makes it darker, smoother, and more mellow in flavor.
It does not react with baking soda the same way, so recipe chemistry matters here.
For fudgy brownies specifically, Dutch-process cocoa powder is usually the better choice. It produces a deeper color, a more intense chocolate flavor, and a denser, fudgier crumb.
That said, natural cocoa powder still makes excellent brownies if that is what you have on hand. Just do not swap them interchangeably in recipes that were designed around one or the other.
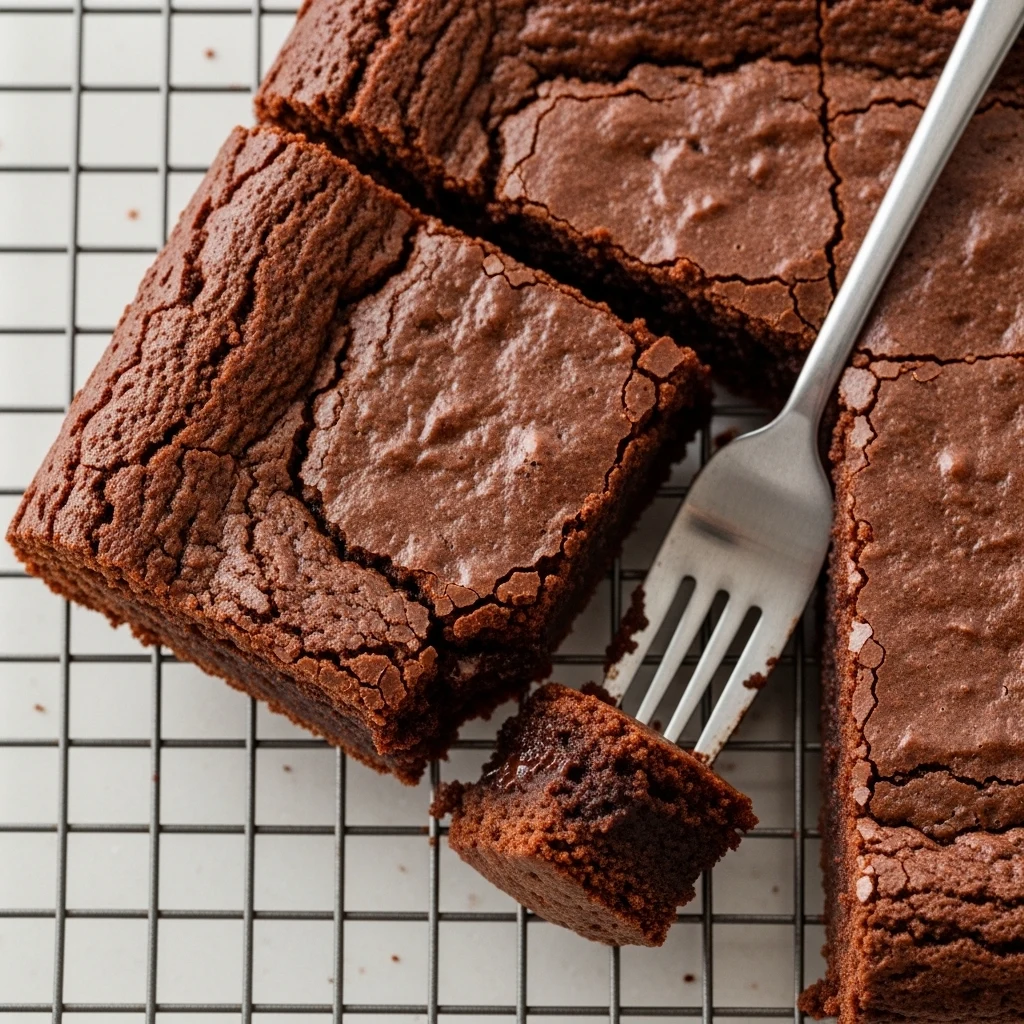
The Science Behind Fudgy Brownies
Before you even preheat your oven, it helps to understand what makes a brownie fudgy versus cakey.
Because trust me, nobody wants to accidentally bake a chocolate cake in a square pan and call it a brownie.
Fudginess comes down to three key factors:
- Fat-to-flour ratio: More fat (butter or oil) relative to flour means a denser, moister texture.
- Egg yolks vs. whole eggs: Yolks add richness and fat. More yolks equal more fudge. More whites equal more structure and lift.
- Baking time: Underbaking slightly is actually intentional for fudgy brownies. The center should look just barely set when you pull them from the oven.
Cocoa powder fits perfectly into the fudgy brownie equation because it adds flavor without adding extra fat or moisture from cocoa butter.
This means you have complete control over the fat content through your butter and eggs.
The Ingredients You Actually Need
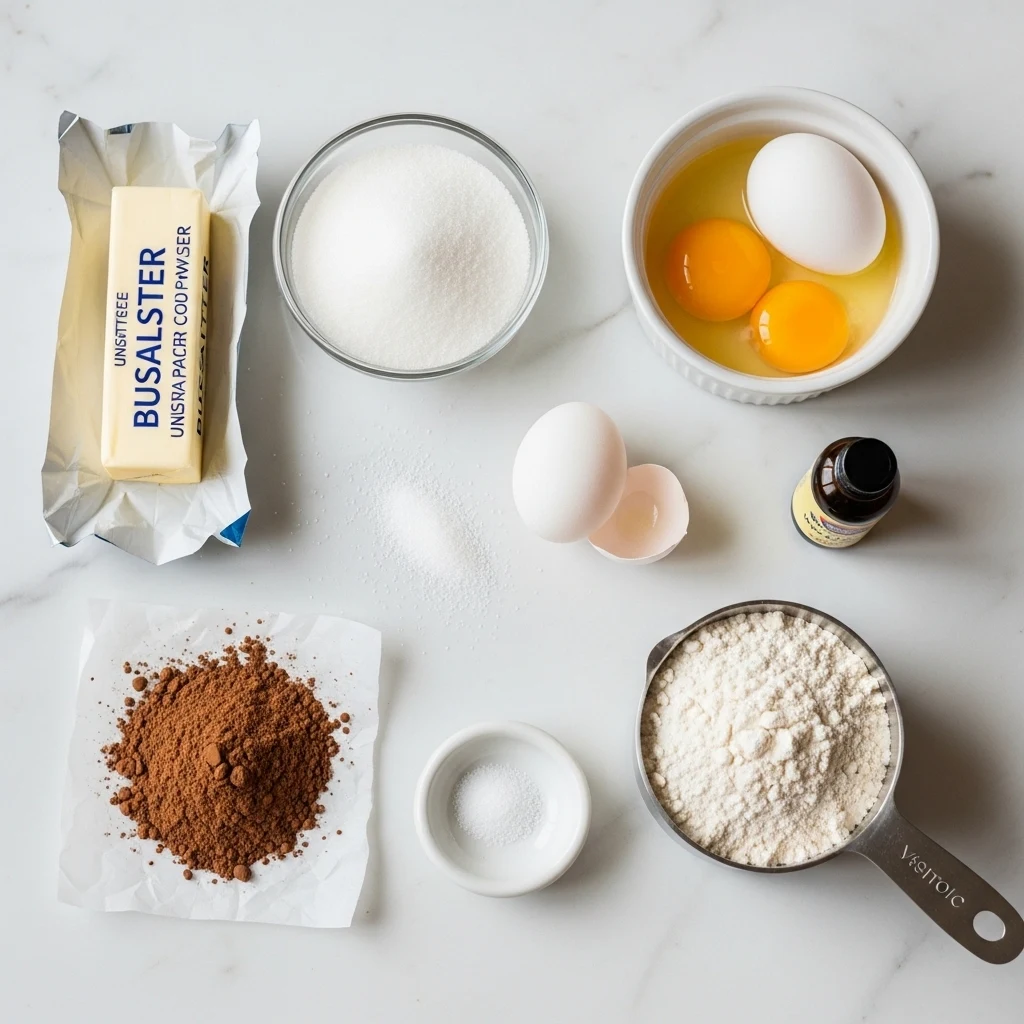
No fancy equipment, no obscure pantry items. Here is what goes into a genuinely great batch of fudgy cocoa powder brownies.
The Core Ingredients
- Unsalted butter: The base of your fat. Melting it (rather than creaming it) contributes to a denser, fudgier texture.
- Granulated sugar: Helps create that shiny, crackly top that everyone loves.
- Eggs: Two whole eggs plus one extra yolk is a reliable formula for richness without going overboard.
- Cocoa powder: At least 1/2 cup, and do not be shy. This is the star.
- All-purpose flour: Less than you think. Around 1/2 to 2/3 cup for an 8×8 pan.
- Salt: Non-negotiable. Salt amplifies chocolate flavor in a way that nothing else does.
- Vanilla extract: A teaspoon rounds out the bitterness of the cocoa.
Find Espresso Powder On Amazon
Optional But Worth It
- Espresso powder: Half a teaspoon deepens the chocolate flavor without making your brownies taste like coffee.
- Chocolate chips: Stirred into the batter right before baking for pockets of melted chocolate in every bite.
- Brown sugar: Swap half the granulated sugar for brown sugar to add a subtle caramel undertone.
How to Make Fudgy Cocoa Powder Brownies: Step by Step
Here is the method that consistently produces that dense, glossy, pull-apart fudgy texture.
Step 1: Melt Your Butter the Right Way
Melt your butter in a saucepan over medium-low heat, or in a microwave in short bursts.
Do not let it bubble aggressively or brown unless that is intentional (browned butter brownies are a whole other conversation, and a very good one).
Once melted, take it off the heat and let it cool for about five minutes. You do not want to scramble your eggs when you add them.
Step 2: Whisk in Sugar and Eggs
Add your sugar to the warm butter and whisk until combined. Then add your eggs and extra yolk, whisking vigorously for about a minute. This step is more important than it sounds.
Beating the eggs with the sugar dissolves some of the sugar crystals and creates that signature shiny, crackly brownie top. Skimp on this step and you lose the crackle.
Add your vanilla and whisk again.
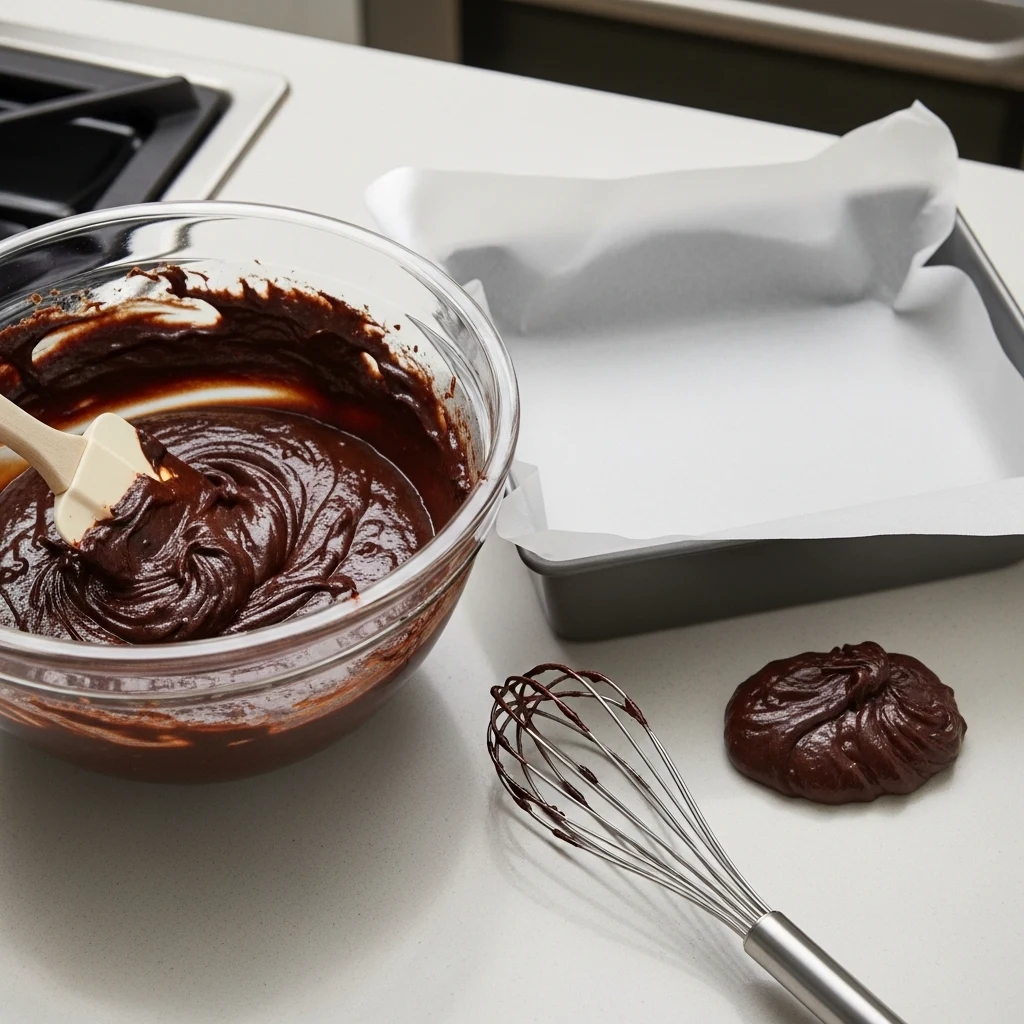
Step 3: Add the Cocoa and Dry Ingredients
Sift your cocoa powder directly into the wet mixture. Sifting prevents lumps and ensures even distribution. Stir it in with a rubber spatula rather than a whisk to avoid overworking the batter.
Add your flour and salt, then fold gently until just combined. Stop the moment you no longer see streaks of flour. Overmixing develops gluten, and gluten is the enemy of fudgy brownies.
Step 4: Bake Low and Slow (Well, Relatively)
Pour your batter into an 8×8 pan lined with parchment paper. Lining with parchment is not optional if you ever want to get your brownies out cleanly.
Bake at 325 degrees Fahrenheit (160 degrees Celsius) for 22 to 28 minutes. The lower temperature helps the brownies cook through evenly without drying out the edges before the center sets.
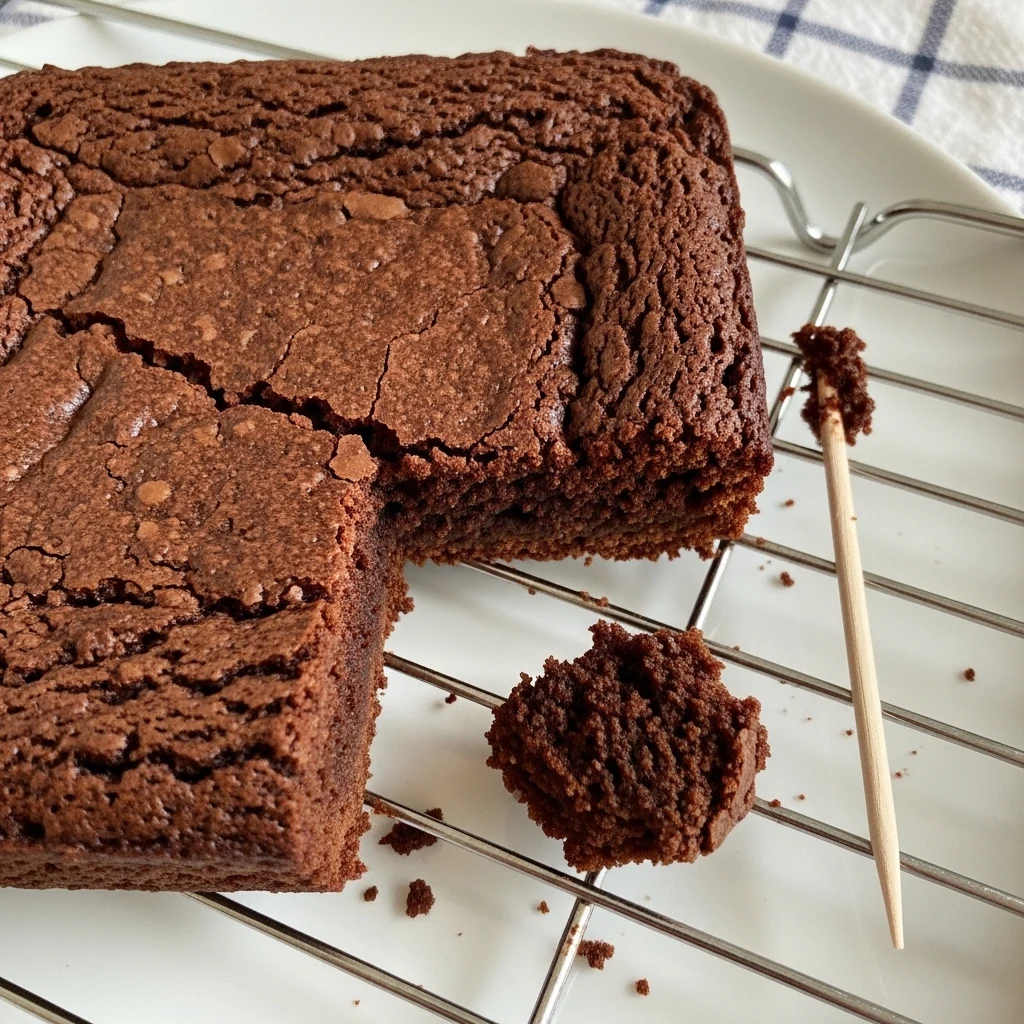
The toothpick test works differently for fudgy brownies. You want a few moist crumbs clinging to the toothpick, not a completely clean pull. If it comes out clean, you have gone a little too far.
Grab Parchment Paper On Amazon
Step 5: Let Them Cool (The Hardest Part)
Let the brownies cool in the pan for at least 30 minutes before cutting. An hour is better. Overnight in the fridge is best if you can manage it, because cold brownies slice cleaner and taste even fudgier.
Can you wait that long? Probably not. Will you try anyway? Hopefully.
Common Mistakes That Ruin Fudgy Brownies
Even a solid recipe can go sideways. Here are the mistakes worth knowing before you start.
Overbaking is the most common culprit. Brownies continue cooking from residual heat after you pull them from the oven. Always err on the side of pulling them out a minute or two early.
Using cold eggs straight from the fridge can cause the melted butter to seize and clump. Let your eggs come to room temperature, or drop them in a bowl of warm water for five minutes.
Skipping the salt makes your brownies taste flat and one-dimensional. Even if you use salted butter, a pinch of additional flaky sea salt on top before baking makes a noticeable difference.
Not measuring flour properly leads to cakey, dry brownies. Spoon the flour into your measuring cup and level it off with a straight edge.
Do not scoop directly from the bag, because you compact the flour and end up using too much.
How to Customize Your Cocoa Brownies
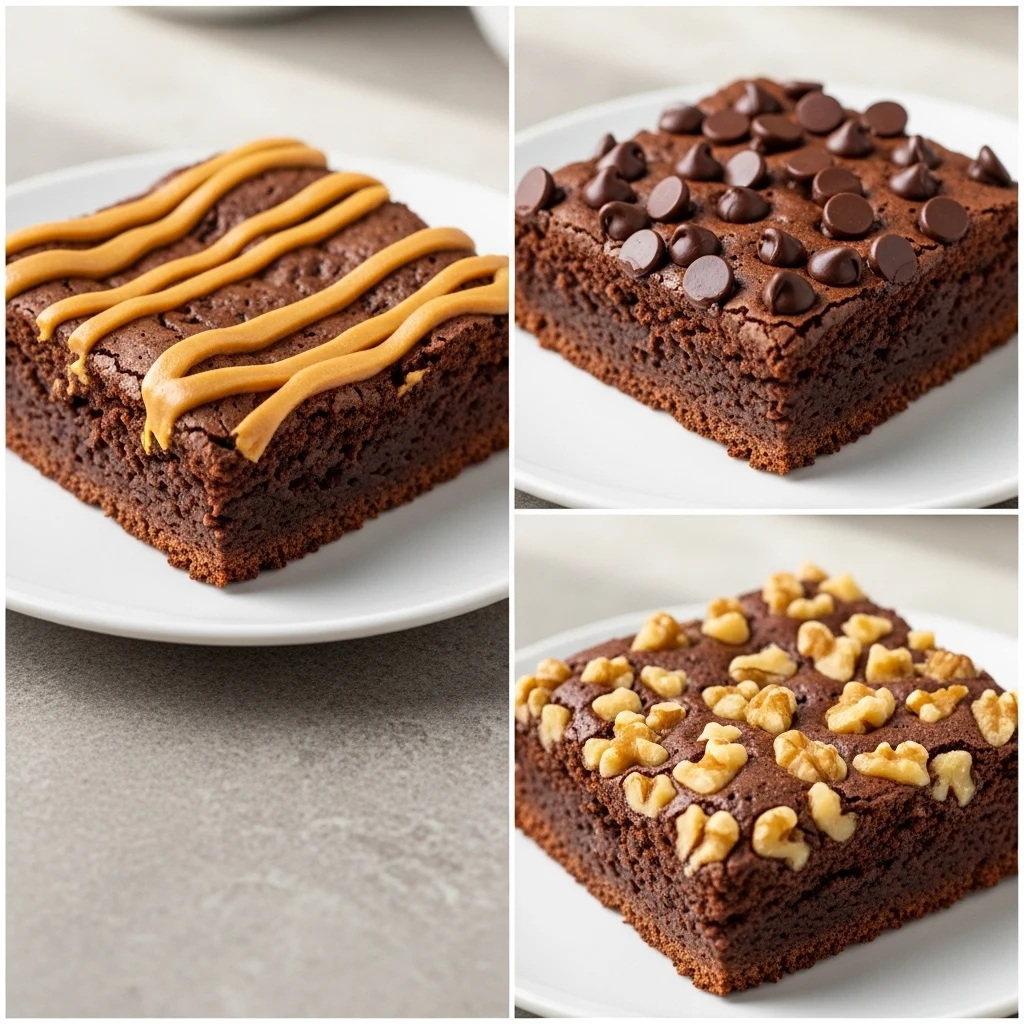
Once you have the base recipe down, the variations are genuinely fun to experiment with.
- Peanut butter swirl: Drop spoonfuls of peanut butter over the batter and drag a knife through to create a marbled effect.
- Tahini brownies: Swap the peanut butter for tahini for a nuttier, more complex flavor.
- Mint chip: Add a quarter teaspoon of peppermint extract and fold in chocolate chips.
- Walnut or pecan: Fold in half a cup of toasted, roughly chopped nuts for crunch and depth.
- Cayenne chocolate: A pinch of cayenne in the batter adds a slow, warm heat that builds after the first bite.
Storing and Freezing Your Brownies
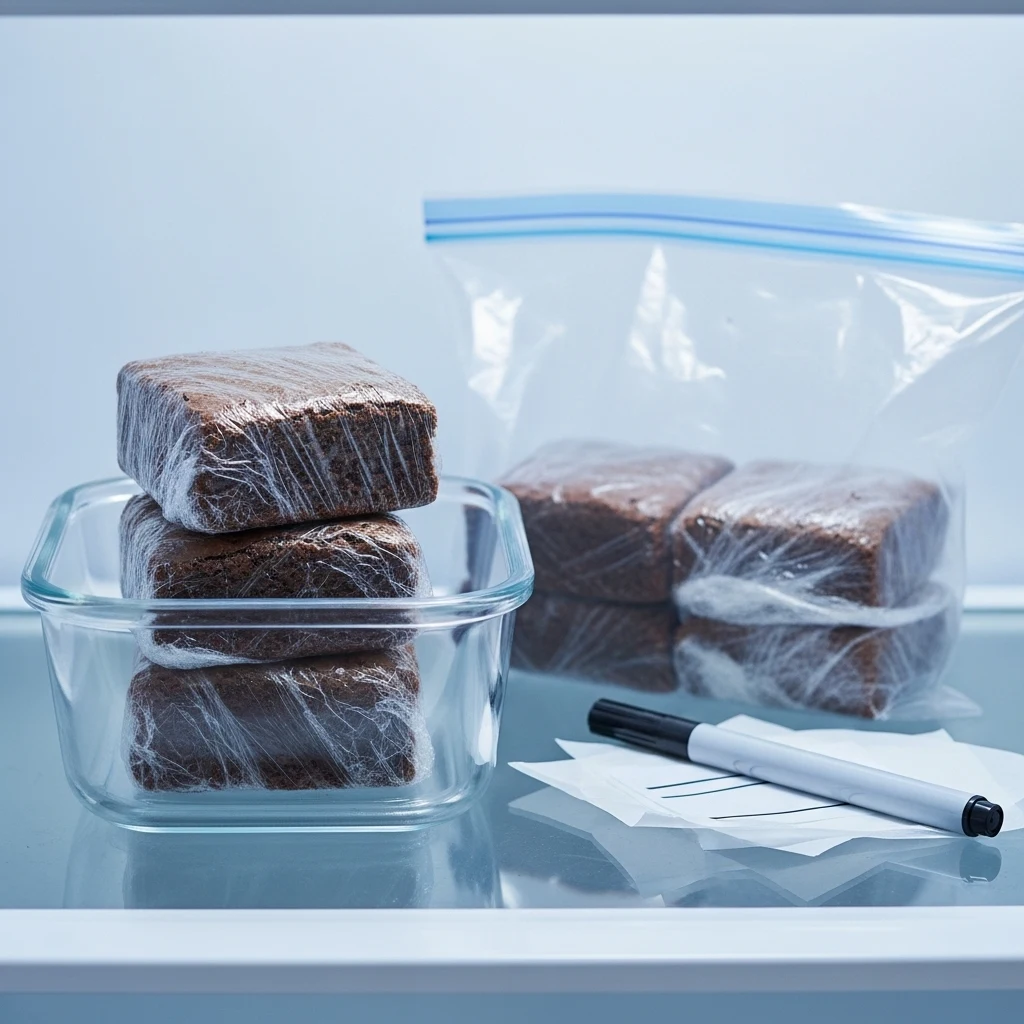
At room temperature: Store brownies in an airtight container for up to four days. They actually get fudgier on day two.
In the fridge: Up to a week. Cold brownies have a denser, almost truffle-like texture that a lot of people prefer.
In the freezer: Brownies freeze beautifully. Wrap individual squares in plastic wrap, then store them in a freezer bag for up to three months. Thaw at room temperature or microwave for 20 seconds.
Shop Airtight Containers On Amazon
The Bottom Line
Fudgy homemade brownies made with cocoa powder are one of those baking wins that look impressive but are genuinely approachable once you understand the basics.
The cocoa powder does the heavy lifting when it comes to flavor, the fat-to-flour ratio does the heavy lifting when it comes to texture, and a little patience at the end does the heavy lifting when it comes to clean slices and that perfect dense bite.
You do not need melted chocolate, a stand mixer, or any special technique. You need good cocoa powder, a bowl, and the willpower to let them cool before you cut in.
Two out of three is usually how it goes, and that is perfectly fine.
Go make a batch. You already know you want to.
Can I Use Natural Cocoa Powder Instead of Dutch-Process Cocoa Powder for Fudgy Brownies?
Yes, you can use natural cocoa powder, but expect a different result. Natural cocoa is more acidic and gives a sharper, fruitier flavor.
In contrast, Dutch-process cocoa offers a deeper, smoother taste. Your brownies will still be tasty, but they may be lighter in color and less chocolatey.
If your recipe specifically calls for Dutch-process cocoa and you only have natural, you can make the swap. Just know that the texture and flavor will change slightly.
How Do I Know When My Cocoa Powder Brownies Are Done Baking?
The toothpick test works well, but it’s different for fudgy brownies. You don’t want a clean toothpick.
Instead, aim for a toothpick that has a few moist crumbs on it. If it comes out clean, your brownies are overbaked.
Check the edges, too. They should look set and start to pull away from the pan sides, while the center should look barely done.
Remember, residual heat keeps cooking the brownies after you take them out. So, pulling them out a minute early is often the best choice.
Why Did My Cocoa Powder Brownies Turn Out Cakey Instead of Fudgy?
A few things might cause this. The most common reason is too much flour. This usually happens when you scoop directly from the bag, compacting it.
Always spoon flour into the measuring cup and level it off. Using too many egg whites instead of whole eggs or extra yolks adds structure and lift.
This can make brownies more cakey. Overbaking is another key factor. Lastly, melt your butter instead of creaming it. Creaming adds air, resulting in a lighter, cakier texture.
Can I Make Cocoa Powder Brownies Without an Electric Mixer?
Absolutely, and you probably should. Fudgy brownies are best mixed by hand. Use a rubber spatula or a sturdy whisk. Electric mixers can overwork the batter and add too much air.
This can make your brownies cakey. The only time to whisk vigorously is when you mix the eggs and sugar. You can do that by hand in about a minute.
How Do I Get That Shiny, Crackly Top on My Cocoa Powder Brownies?
The shiny, crackly top forms from the mix of dissolved sugar and eggs. Whisk the eggs and sugar together for at least one minute after adding melted butter.
This helps dissolve the sugar crystals and creates a thin meringue-like layer on the batter’s surface. As it bakes, this layer forms the glossy, crackled crust.
Using granulated white sugar instead of brown sugar also helps. Brown sugar holds more moisture and can reduce the crackling effect.