
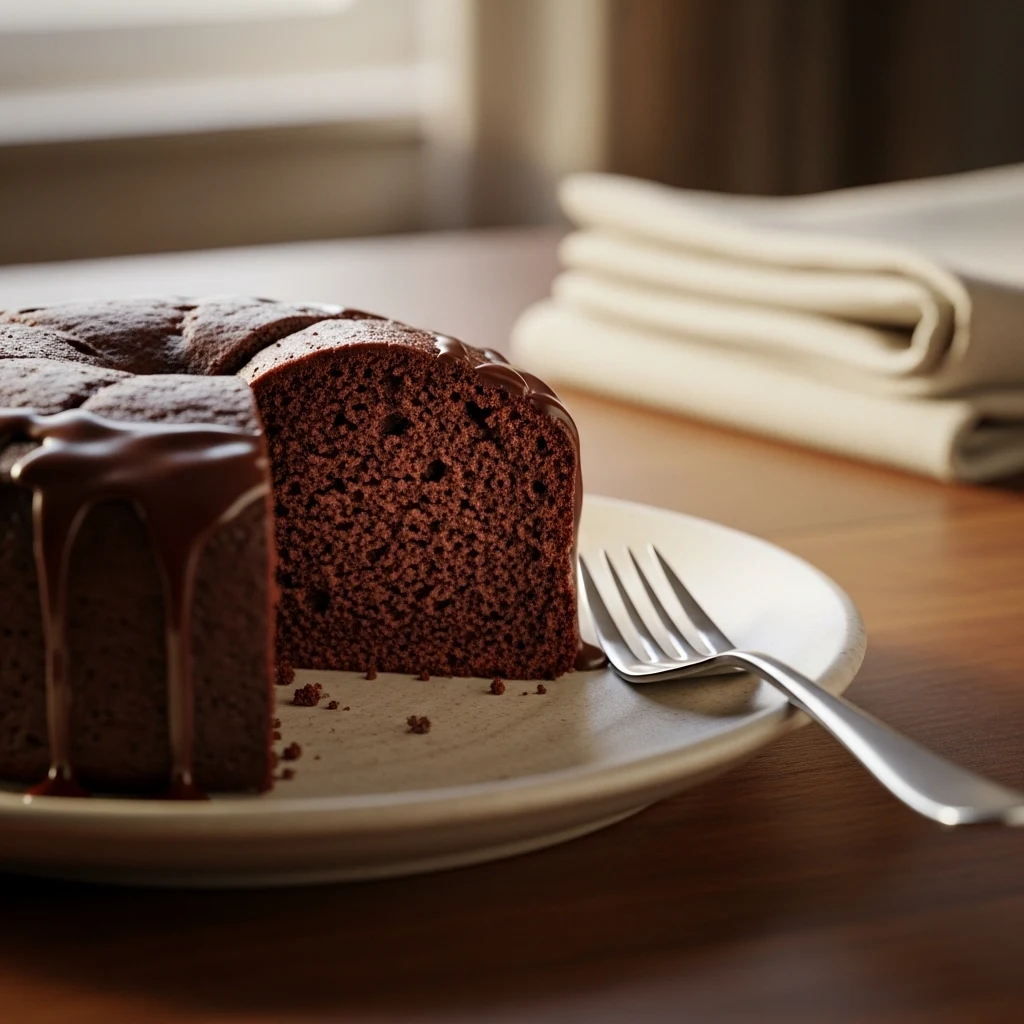
If you’ve ever bitten into a gluten-free chocolate cake that tasted like cardboard, you’re not alone.
Finding a recipe that offers moisture, richness, and deep chocolate flavor often feels impossible. But today is your lucky day! This easy, moist gluten-free chocolate cake recipe is the real deal.
I baked my first gluten-free chocolate cake out of necessity. My sister was diagnosed with celiac disease.
What began as a kitchen experiment became one of my most-requested recipes. Trust me, this cake doesn’t compromise on anything.
Why This Gluten Free Chocolate Cake Works
Before we get our hands dirty, let us talk about why so many gluten free cakes fail. Most recipes swap out regular flour for a gluten free alternative and call it a day.
The result? A crumbly, dry mess that everyone politely pretends to enjoy. This recipe takes a different approach.
The secret lies in combining the right gluten free flour blend with ingredients that add natural moisture.
We are not just removing gluten; we are actively building structure and tenderness through smart ingredient choices.
When you understand the “why” behind a recipe, you bake with so much more confidence.
The Role of Xanthan Gum
Gluten gives regular cakes their stretchy, binding structure. Without it, cakes fall apart. Xanthan gum steps in as the binding agent that holds everything together.
Most commercial gluten free flour blends already include it, so always check your flour label before adding extra. Too much xanthan gum makes cakes gummy, and nobody wants that.
Why Buttermilk Is a Game-Changer
Buttermilk reacts with baking soda to create lift and a tender crumb. It also adds a subtle tang that balances the sweetness of the chocolate.
If you do not have buttermilk on hand, mix one tablespoon of white vinegar or lemon juice into one cup of regular milk and let it sit for five minutes. Works like a charm every single time.
Ingredients You Will Need
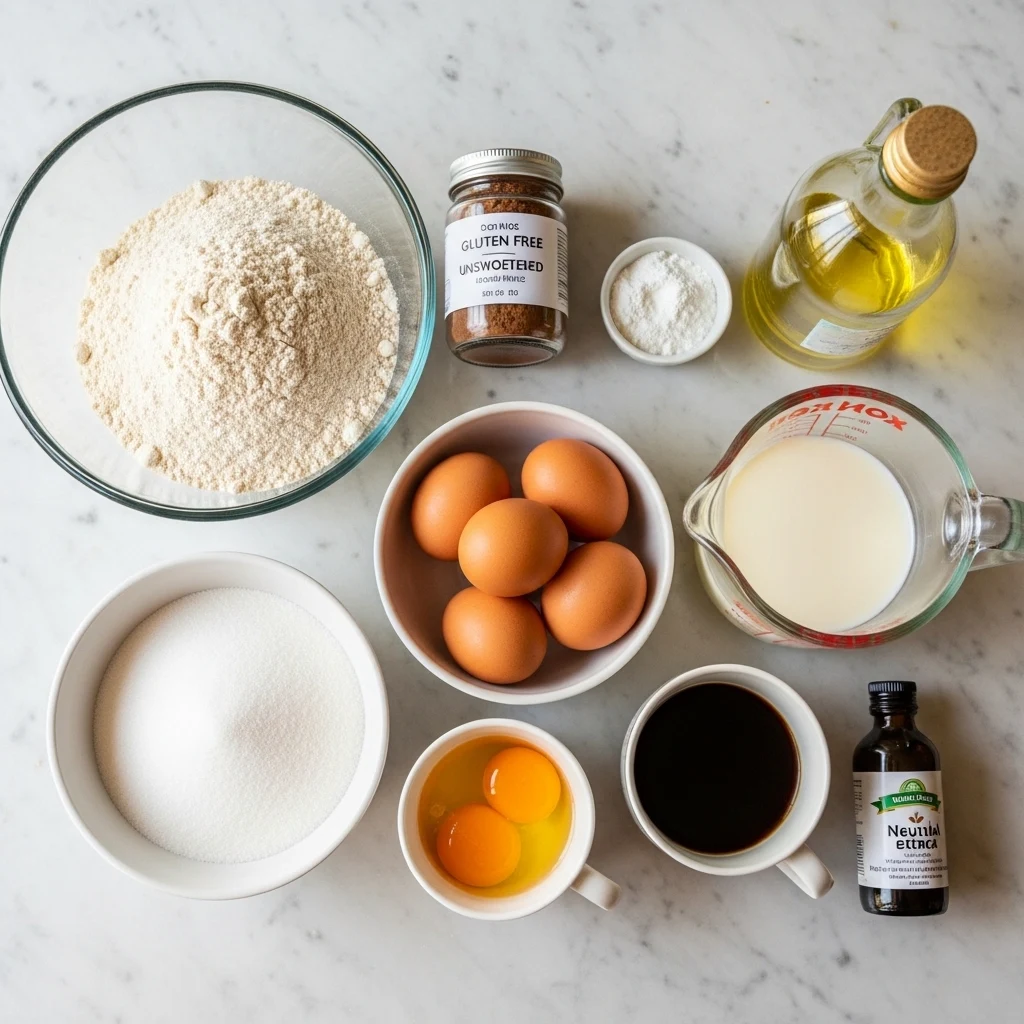
Here is everything that goes into this gluten free chocolate cake. These quantities make two 9-inch round cake layers, perfect for stacking into a proper celebration cake.
For the cake:
- 1 and 3/4 cups gluten free all-purpose flour blend (with xanthan gum included)
- 3/4 cup unsweetened cocoa powder (Dutch-processed works best)
- 2 cups granulated sugar
- 2 teaspoons baking soda
- 1 teaspoon baking powder
- 1 teaspoon fine sea salt
- 2 large eggs, at room temperature
- 1 cup buttermilk, at room temperature
- 1 cup strong brewed coffee, cooled (or hot water as a substitute)
- 1/2 cup neutral oil (vegetable, canola, or sunflower)
- 2 teaspoons pure vanilla extract
For the chocolate buttercream:
- 1 cup unsalted butter, softened
- 3 and 1/2 cups powdered sugar, sifted
- 1/2 cup unsweetened cocoa powder
- 1/3 cup heavy cream
- 2 teaspoons vanilla extract
- Pinch of salt
A quick note on the coffee: do not skip it. Coffee does not make the cake taste like coffee; it deepens the chocolate flavour in a way that nothing else can replicate.
Think of it as the ultimate chocolate amplifier.
Shop All Baking Ingredients On Amazon
Step-by-Step Instructions
Ready to bake? Good. Follow these steps carefully and you will pull the most impressive gluten free chocolate cake out of your oven.
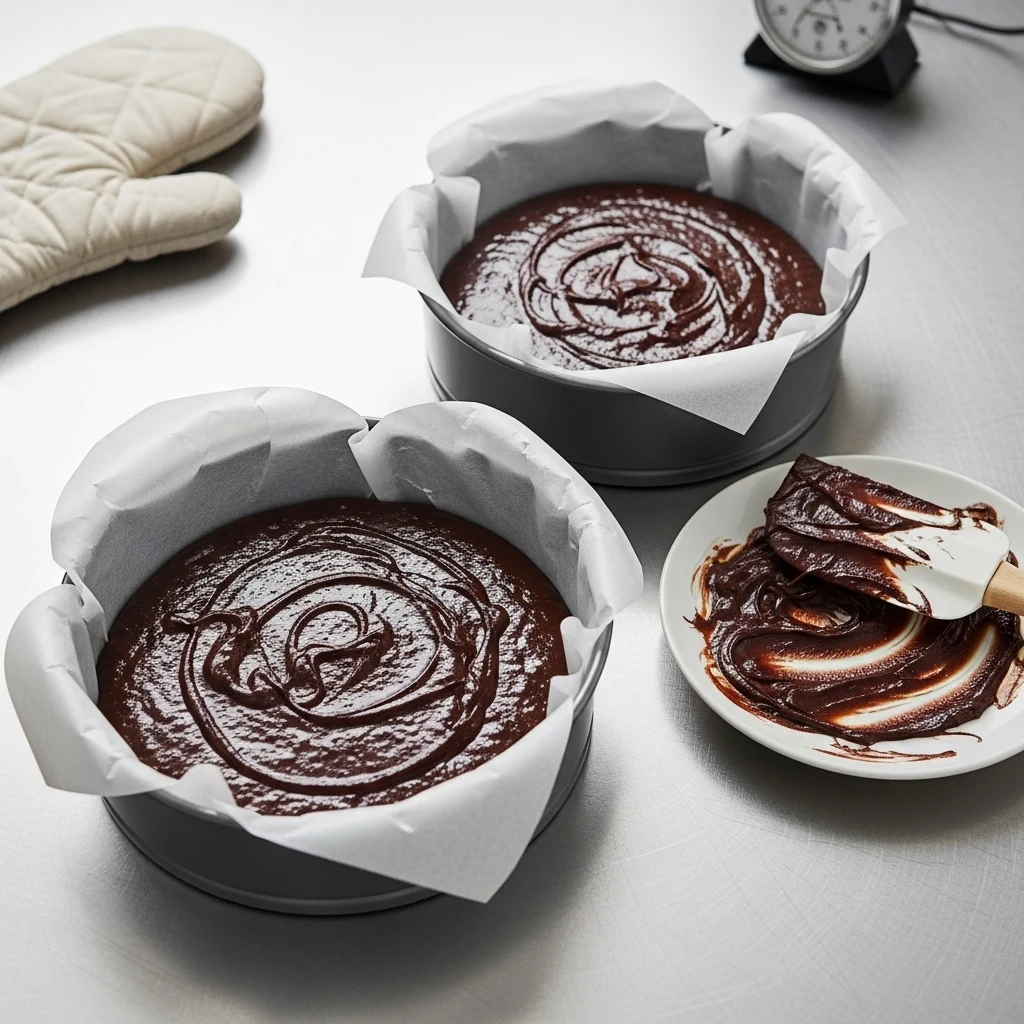
Step 1: Prepare Your Pans and Oven
Preheat your oven to 350 degrees Fahrenheit (175 degrees Celsius).
Grease two 9-inch round cake pans generously with butter or cooking spray, then line the bottoms with parchment paper circles.
Gluten free cakes stick more easily than their wheat-based cousins, so do not skip the parchment.
Shop Cake Pans And Baking Tools On Amazon
Step 2: Mix the Dry Ingredients
In a large mixing bowl, whisk together the gluten free flour, cocoa powder, sugar, baking soda, baking powder, and salt.
Whisking thoroughly ensures even distribution of the leavening agents, which means your cake rises evenly without random air pockets. Spend a full minute on this step. It genuinely matters.
Step 3: Combine the Wet Ingredients
In a separate bowl or large measuring jug, whisk together the eggs, buttermilk, cooled coffee, oil, and vanilla extract. Make sure your eggs and buttermilk are at room temperature.
Cold ingredients do not incorporate as smoothly, which affects your final texture. Pull them out of the fridge about 30 minutes before you start baking.
Step 4: Bring It All Together
Pour the wet ingredients into the dry ingredients and whisk gently until just combined. Here is a common mistake people make: over-mixing.
Stop mixing the moment you no longer see streaks of flour. The batter will look thinner than a regular chocolate cake batter. That is completely normal and exactly what you want.
Step 5: Bake the Cakes
Divide the batter evenly between your prepared pans. You can use a kitchen scale for precision, or just eyeball it.
Bake for 30 to 35 minutes, until a toothpick inserted into the centre comes out with just a few moist crumbs attached.
No wet batter, no completely dry toothpick. Those few moist crumbs are the sweet spot.
Step 6: Cool Completely Before Frosting
Let the cakes cool in their pans for 15 minutes, then turn them out onto a wire rack. Do not attempt to frost a warm cake.
The buttercream will melt right off and you will end up with a very sad, very glossy puddle. Let the layers cool completely, at least one hour, before you think about frosting.
How to Make the Chocolate Buttercream
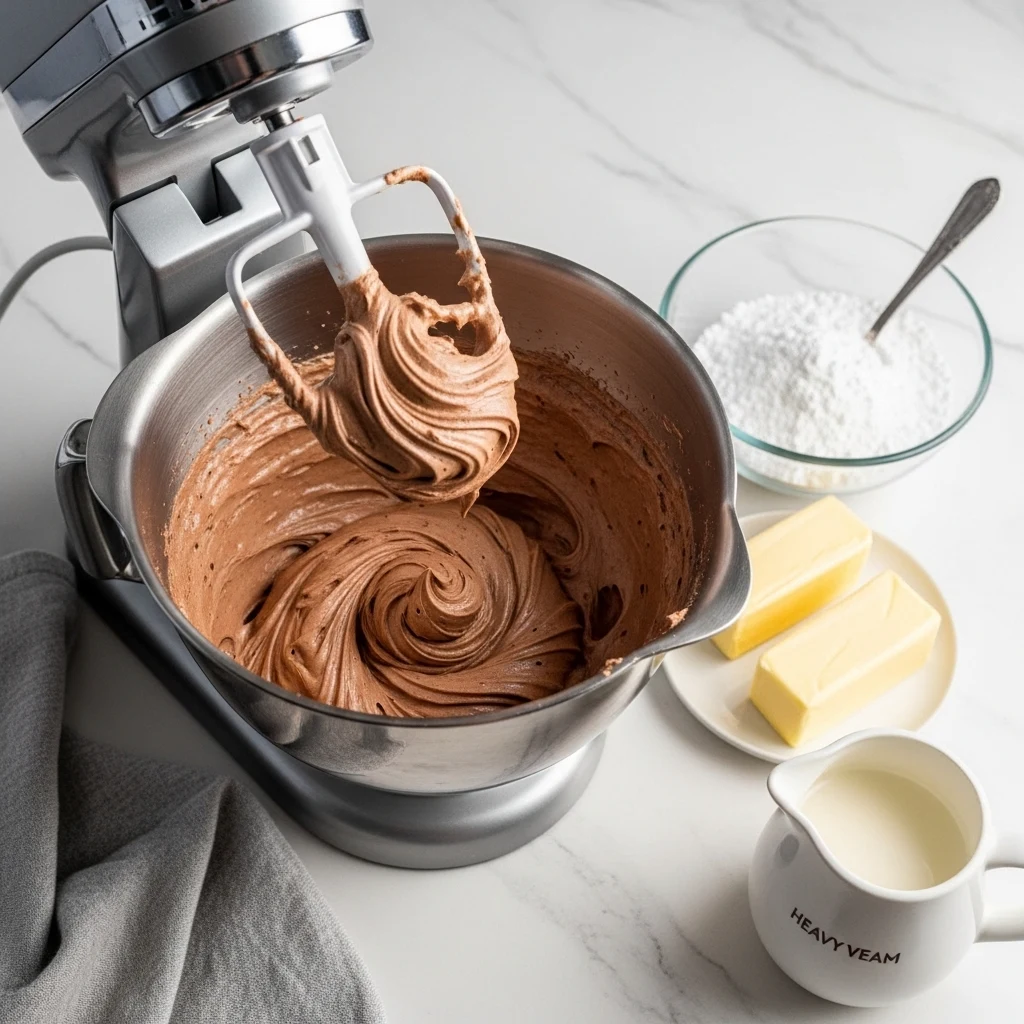
While your cake layers cool, whip up this silky chocolate buttercream. It comes together in minutes and tastes genuinely incredible.
Beat the softened butter with an electric mixer on medium-high speed for about 3 minutes until it turns pale and fluffy. Add the sifted cocoa powder and mix on low speed until combined.
Gradually add the powdered sugar, about half a cup at a time, alternating with splashes of heavy cream.
Add the vanilla and a pinch of salt, then beat on high for 2 minutes until the frosting is light and spreadable.
If your buttercream looks too thick, add cream one teaspoon at a time. Too thin? Add a little more powdered sugar.
Frosting is very forgiving, so adjust until it reaches the consistency you want.
Shop Electric Mixers On Amazon
Assembling Your Gluten Free Chocolate Cake
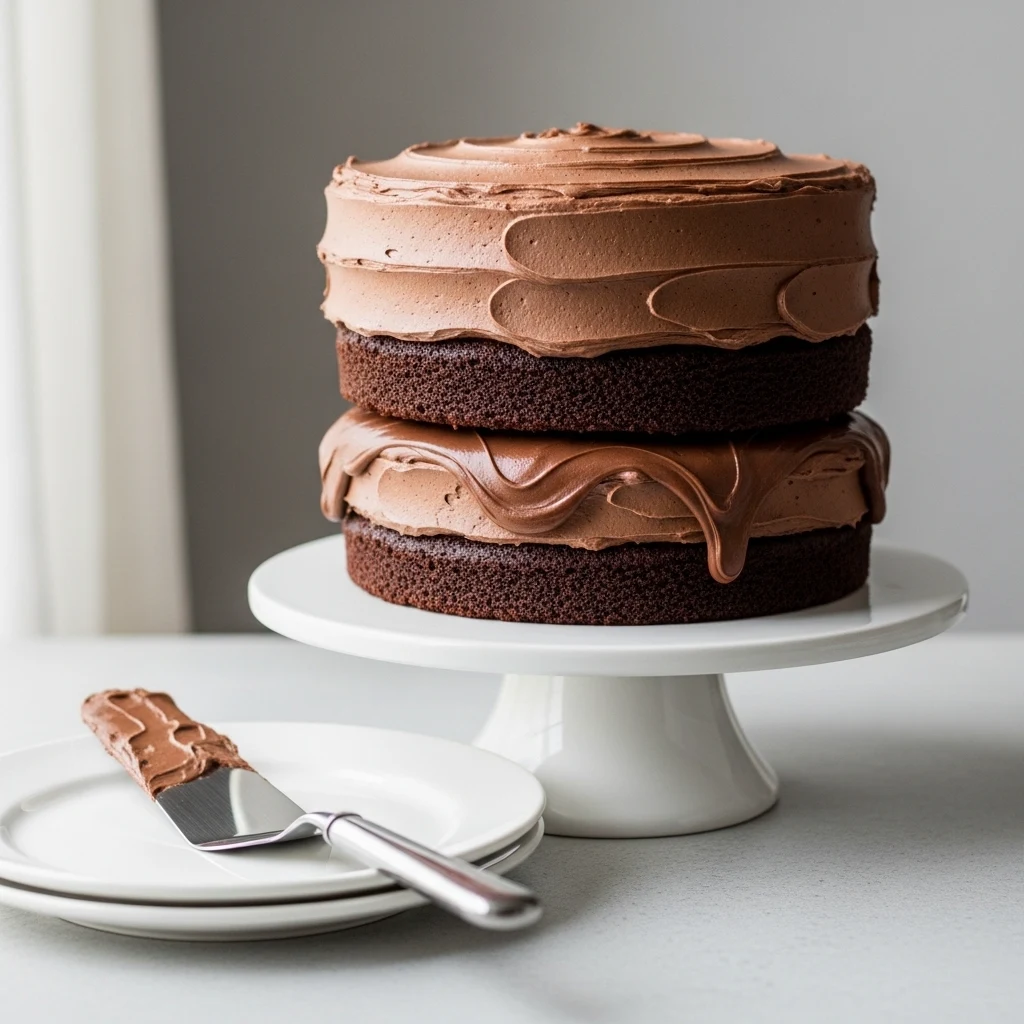
Place one cake layer on your serving plate or cake board. Spread a generous layer of buttercream across the top, all the way to the edges.
Place the second layer on top, pressing gently to secure it. Then frost the outside of the cake however you like. Rustic swoops, smooth sides, dramatic swirls on top – your cake, your rules.
Want to make it look extra special without much effort? Run a large spoon across the top of the frosting in a circular pattern to create texture.
It looks intentional and professional even if you are holding the spoon for the very first time.
Tips for the Moistest Gluten Free Chocolate Cake Every Time
Baking gluten free is slightly less forgiving than regular baking, but these tips will set you up for consistent success.
- Measure your flour correctly. Spoon the flour into your measuring cup and level it off with a straight edge. Scooping directly from the bag packs too much flour in and leads to a dense cake.
- Use Dutch-processed cocoa for a deeper, smoother chocolate flavour compared to natural cocoa.
- Do not open the oven door during the first 25 minutes of baking. Temperature fluctuations cause the cake to sink in the middle.
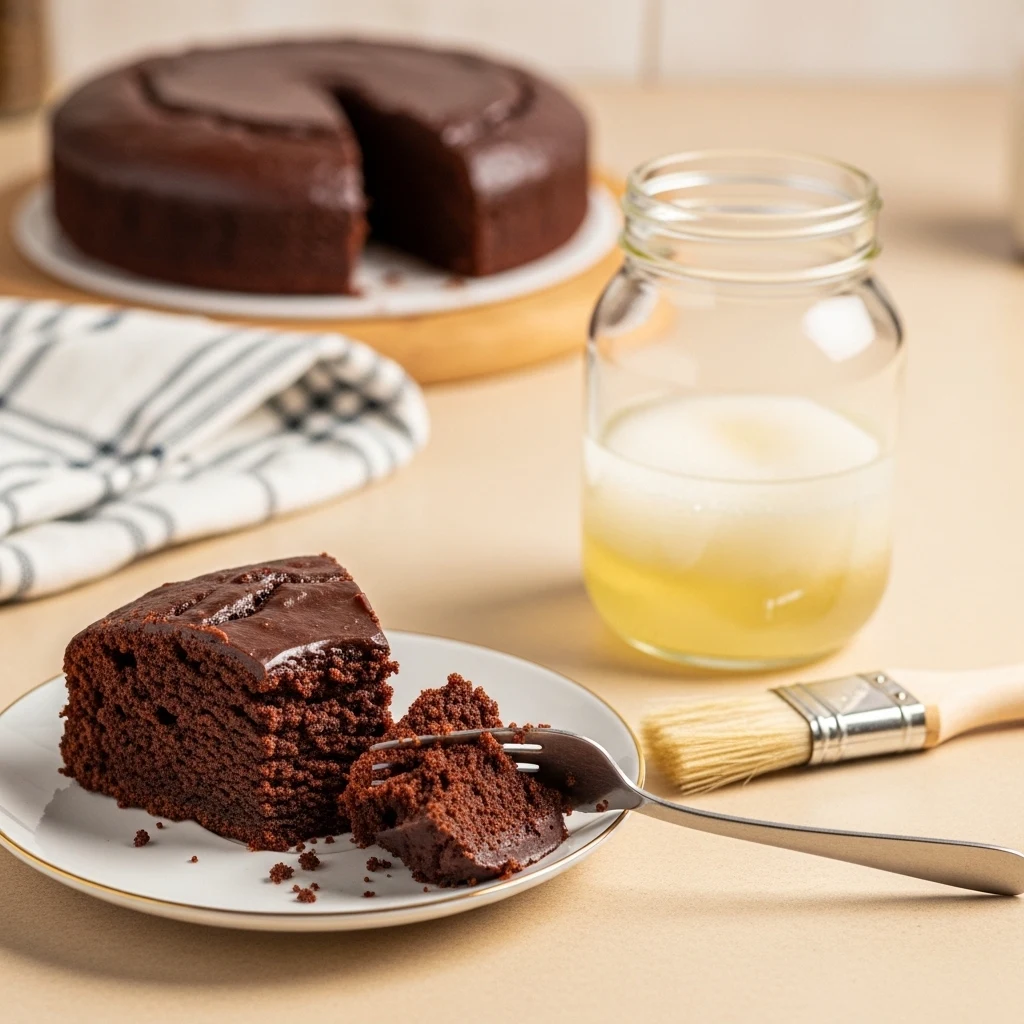
- Brush cooled cake layers with simple syrup (equal parts sugar and water, dissolved together) before frosting for an extra moisture boost. This trick works with every cake, gluten free or not.
- Store leftovers properly. Cover the cake tightly and store at room temperature for up to 3 days, or refrigerate for up to 5 days. Bring refrigerated slices to room temperature before serving for the best texture.
Can You Make This Cake Dairy Free Too?
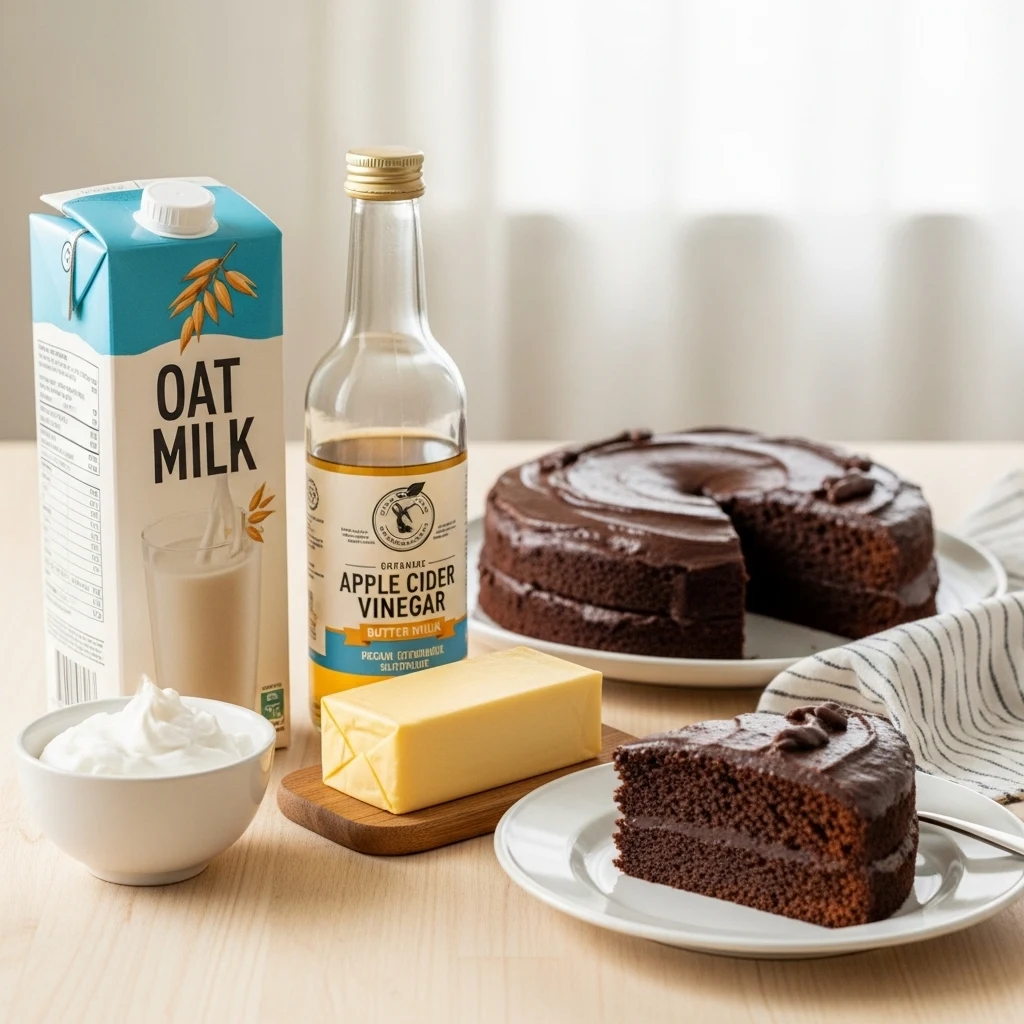
Absolutely. Swap the buttermilk for a dairy-free alternative by mixing one tablespoon of apple cider vinegar into one cup of oat milk or almond milk.
Use vegan butter and coconut cream in the frosting. The result is just as moist and chocolatey, with zero dairy involved.
This cake really is accommodating for most dietary needs, which makes it a brilliant go-to for parties and gatherings where guests have mixed dietary requirements.
Storing and Freezing This Cake
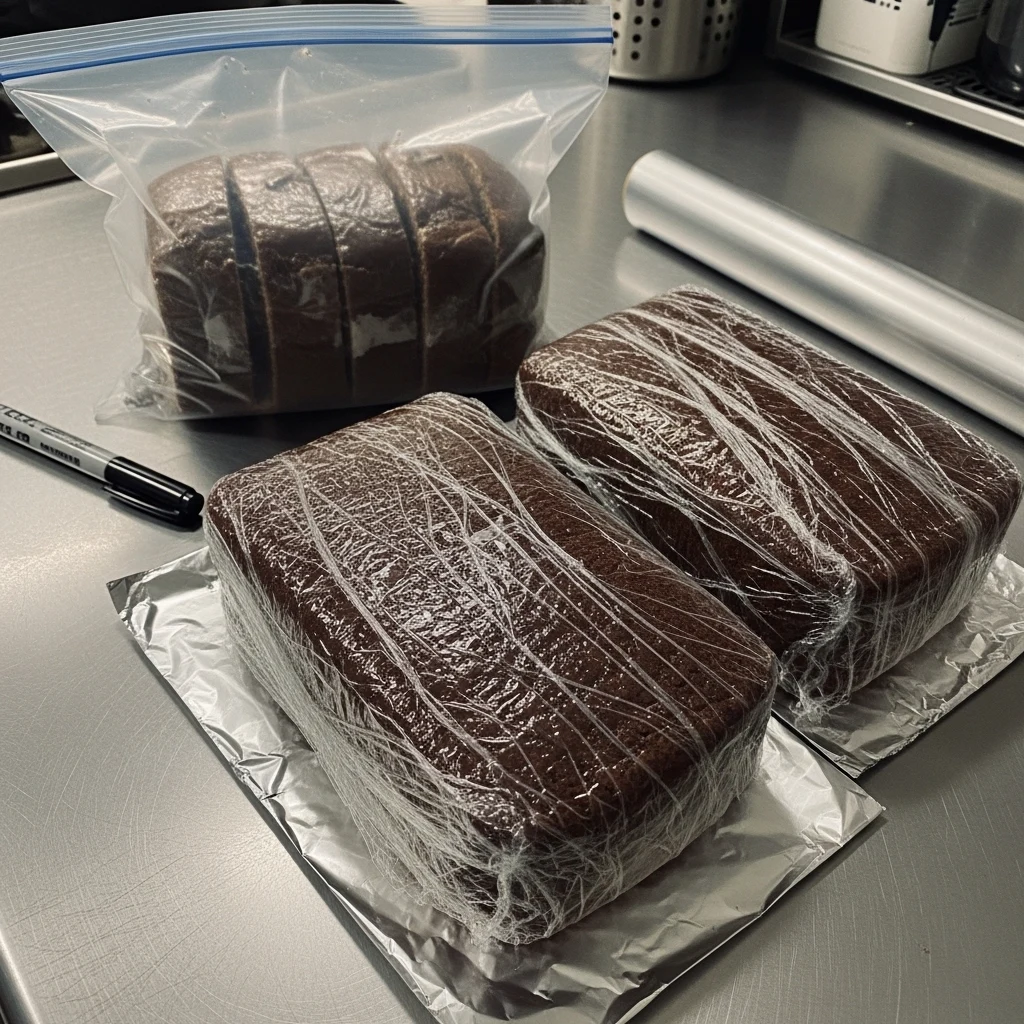
One of the best things about this gluten free chocolate cake is that it freezes beautifully.
Bake the layers, let them cool completely, then wrap each layer tightly in plastic wrap followed by a layer of aluminium foil.
Freeze for up to 3 months. When you are ready to use them, let the layers thaw overnight in the fridge, then bring them to room temperature before frosting.
You can also freeze individual slices of the finished cake. Wrap each slice in plastic wrap and store in a freezer-safe bag. Future you will be very grateful.
Shop Food Storage Essentials On Amazon
The Bottom Line
This easy moist gluten free chocolate cake recipe proves, without a shadow of a doubt, that going gluten free does not mean going flavourless.
The combination of Dutch-processed cocoa, buttermilk, coffee, and a quality gluten free flour blend creates a cake that is every bit as satisfying as the traditional version.
Actually, I have served this to friends who had no idea it was gluten free, and they went back for seconds.
Whether you are baking for someone with celiac disease, a gluten sensitivity, or you just want to try something different, this recipe will not let you down.
Now get into that kitchen, preheat that oven, and make yourself a cake worth talking about.
Can I Use Any Gluten Free Flour for This Chocolate Cake Recipe?
Not all gluten-free flours act the same, so your choice is important.
For this recipe, use a gluten-free all-purpose flour blend with xanthan gum, like Bob’s Red Mill 1-to-1 or King Arthur Measure for Measure.
Single-ingredient flours, such as almond or coconut flour, have different moisture levels and protein structures.
They won’t give you the same moist, tender crumb without major recipe changes. Stick with a good all-purpose blend for the best results.
Why Did My Gluten Free Chocolate Cake Turn Out Dry?
A dry gluten-free chocolate cake usually has three main causes: too much flour, overbaking, or skipping the coffee. Measuring your flour correctly is key.
Always spoon it into the measuring cup and level it off. Scooping from the bag packs in too much flour and dries out the cake.
Also, take the cake out of the oven as soon as a toothpick shows a few moist crumbs. A clean toothpick often means you’ve baked it too long.
How Do I Know When My Gluten Free Chocolate Cake Is Fully Baked?
The toothpick test is your best tool. Insert a toothpick or thin skewer into the center of the cake at the 30-minute mark. You should see a few moist crumbs, but no wet batter.
The edges should pull away slightly from the pan, and the top should spring back when you press it lightly.
Don’t open the oven before 25 minutes. The rush of cool air can make the center sink before it sets.
Can I Make This Gluten Free Chocolate Cake Recipe Ahead of Time?
Yes, making it ahead can improve the texture. Bake the cake layers one day in advance. After they cool completely, wrap them tightly in plastic wrap. Store them at room temperature overnight.
The layers will firm up a bit, making them easier to frost the next day. You can also prepare the buttercream ahead.
Store it in an airtight container in the fridge for up to three days. Just bring it back to room temperature and give it a quick beat before using.
What Is the Best Way to Store Leftover Gluten Free Chocolate Cake?
Cover the cake tightly with plastic wrap or store it in an airtight container at room temperature for up to three days. If you want it to last longer, refrigerate it for up to five days.
Always bring individual slices back to room temperature before serving. Cold cake loses moisture and softness.
For longer storage, wrap individual slices in plastic wrap, place them in a freezer-safe bag, and freeze for up to three months.
Thaw slices on the counter for about an hour before eating. They will taste freshly baked.